
Growing your own vegetables is one of the most rewarding experiences in life. Recently, I decided to take on the challenge of growing string beans from seed to harvest in my village. What started as a simple experiment turned into a fascinating journey, filled with surprises, learning experiences, and ultimately, an abundant harvest. In this blog post, I’ll share my step-by-step process, tips, and what I discovered about cultivating string beans successfully in a village setting. Whether you’re an experienced gardener or a complete beginner, you’ll find this guide practical, insightful, and inspiring.
Why Grow String Beans?
String beans, also known as green beans or snap beans, are highly nutritious and versatile. They are low in calories, rich in vitamins A, C, and K, and packed with fiber. Growing them at home ensures fresh, chemical-free produce and can even become a small-scale source of income if harvested in abundance.
Benefits of growing string beans:
- Nutritional value: High in vitamins, minerals, and antioxidants.
- Easy to grow: With the right care, they thrive even in modest soil conditions.
- Continuous harvest: Regular harvesting encourages new pods to grow.
- Adaptable: Suitable for open fields, raised beds, or containers.
Growing string beans in my village allowed me to connect with nature and observe the growth cycle firsthand, from seed germination to pod formation.
Step 1: Choosing the Right Variety
Selecting the right variety of string beans is crucial for a successful harvest. There are two main types:
- Bush beans: Compact plants that grow close to the ground. These are ideal for small plots and mature quickly. Examples include ‘Contender’ and ‘Blue Lake Bush.’
- Pole beans: Climbing varieties that produce continuously when supported by trellises or poles. Examples include ‘Kentucky Wonder’ and ‘Scarlet Runner.’
For my village garden, I chose pole beans because I had space to install simple trellises, and I wanted a continuous harvest throughout the season.
Step 2: Preparing the Soil
String beans prefer well-draining, fertile soil with a neutral pH (6.0–7.0). In my village garden, the soil was sandy loam, which is ideal because it drains well and warms quickly in the sun.
Steps to prepare the soil:
- Clear weeds, rocks, and debris from the planting area.
- Loosen the soil to a depth of 6–8 inches to encourage root penetration.
- Mix in well-rotted compost or organic manure to provide essential nutrients.
- Avoid excessive nitrogen at the start, as it can promote leaf growth at the expense of flowers and pods.
Preparing the soil carefully ensured healthy seedlings and robust plant growth.
Step 3: Planting the Seeds
Planting seeds correctly is vital for strong germination and early growth.
Planting steps:
- Soak seeds in water for 12–24 hours to speed up germination.
- Plant seeds 1–2 inches deep and about 3–4 inches apart for bush beans. For pole beans, space them 4–6 inches apart along the row.
- If planting in rows, leave 18–24 inches between each row for airflow and ease of harvesting.
After planting, water gently to moisten the soil without washing away seeds. Within 7–10 days, the first sprouts appeared, bringing a sense of excitement and accomplishment.
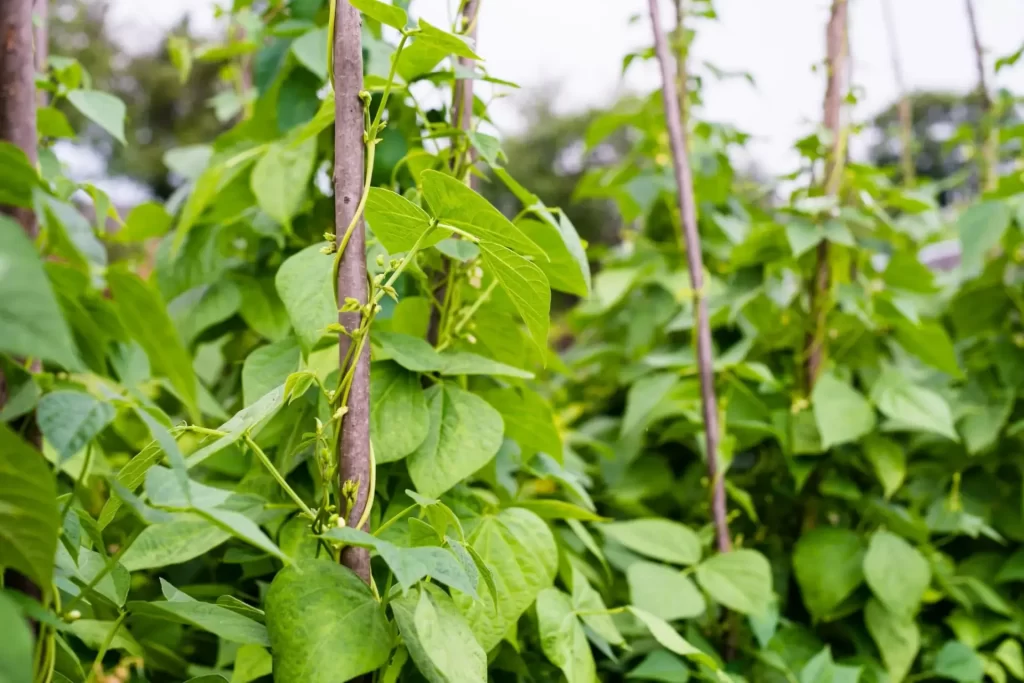
Step 4: Supporting Pole Beans
One key aspect of growing pole beans is providing vertical support. Without support, vines can tangle, become more susceptible to disease, and reduce yield.
Support options:
- Simple wooden poles arranged in an A-frame.
- Trellises made from bamboo, string, or wire mesh.
- Teepee structures formed by tying multiple poles together at the top.
I chose a bamboo trellis in my village garden, which allowed the beans to climb easily and receive full sunlight. This also made harvesting much easier as the pods were off the ground and easier to see.
Step 5: Watering and Mulching
Watering is critical, especially during germination, flowering, and pod formation.
Watering tips:
- Keep soil consistently moist but not waterlogged.
- Water early in the morning to reduce evaporation and prevent fungal growth.
Mulching benefits:
- Conserves soil moisture during hot days.
- Reduces weed growth.
- Helps maintain soil temperature, protecting young roots.
I used dried grass and leaves from around my village as mulch, which not only kept the soil moist but also enriched it as it decomposed.
Step 6: Fertilizing for Maximum Yield
String beans are legumes, which means they can fix their own nitrogen from the air. However, additional nutrients can significantly enhance yield.
Fertilization strategy:
- Apply compost or organic fertilizer at planting.
- During flowering, use a balanced fertilizer high in potassium and phosphorus to encourage pod formation.
- Avoid excess nitrogen, which encourages leafy growth but fewer pods.
Regular feeding ensured vigorous growth and a plentiful harvest.
Step 7: Pruning and Training
For pole beans, training the vines is essential. I guided the young vines toward the trellis and gently tied them using soft strips of cloth. Pruning was minimal—only removing damaged or diseased leaves—to maintain plant energy for pod production.
This step ensured that sunlight reached all parts of the vine, increasing flower production and ultimately, the number of beans.
Step 8: Pest and Disease Management
Even in a village setting, pests and diseases can affect string beans.
Common issues:
- Aphids: Small insects that suck sap from leaves. Treat with neem oil or insecticidal soap.
- Powdery mildew: White powdery coating on leaves, preventable by proper spacing and airflow.
- Bean fly or caterpillars: Remove by hand or use organic sprays.
Monitoring plants regularly helped prevent minor problems from escalating and ensured healthy growth.
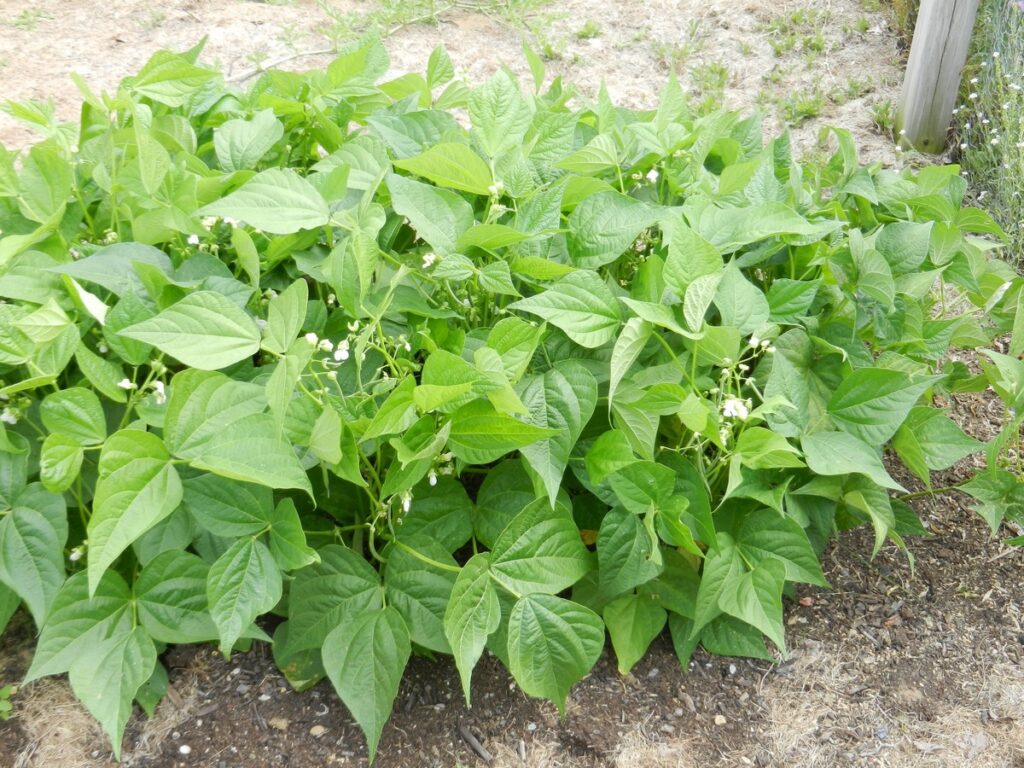
Step 9: Flowering and Pollination
String beans produce small white or purple flowers. These flowers must be pollinated to develop pods. In my village garden, natural pollinators like bees and butterflies did most of the work.
Tips to encourage pollination:
- Avoid using broad-spectrum insecticides that harm pollinators.
- Plant flowering companion plants nearby to attract bees.
- Remove damaged flowers to encourage new blooms.
Healthy flowering directly impacts the number and size of the beans harvested.
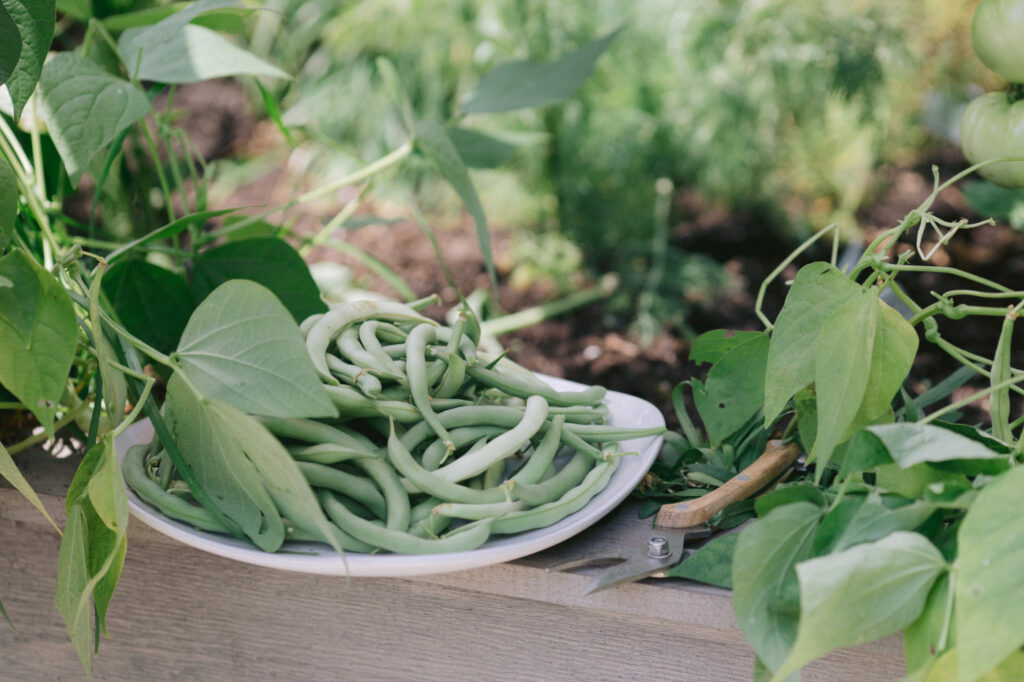
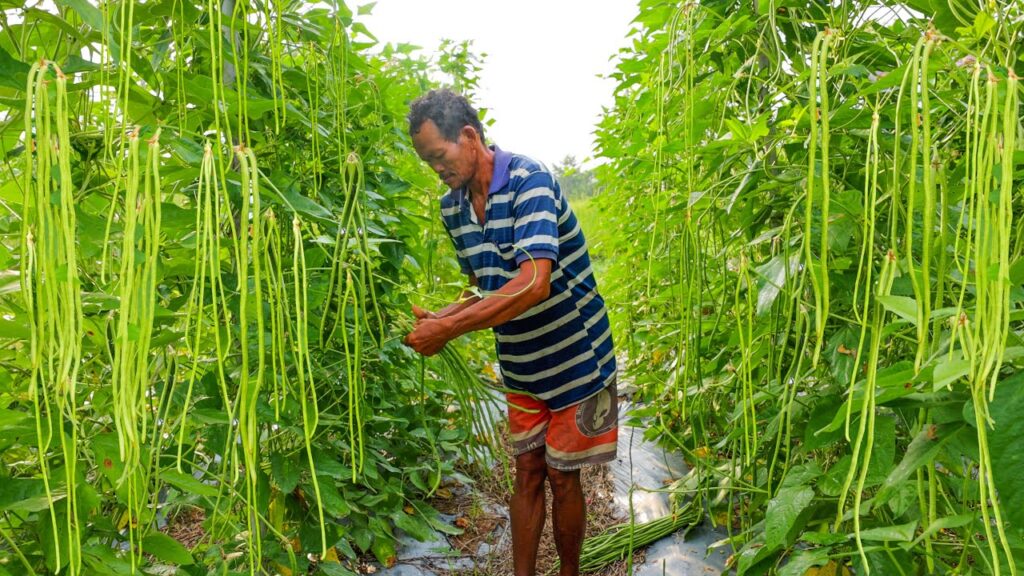
Step 10: Harvesting
Harvesting is both exciting and rewarding. I learned that timely harvesting encourages more pods and prevents over-mature beans from reducing the plant’s energy.
Harvesting tips:
- Pick beans when they are firm, tender, and before seeds bulge.
- Regular harvesting, every 2–3 days, stimulates continuous production.
- Use scissors or gently pull the beans to avoid damaging the vine.
I was amazed at how a single plant could produce multiple harvests over several weeks, giving me more beans than I expected.
Step 11: Observations and Surprises
Growing string beans in my village revealed several lessons and surprises:
- Rapid growth: With proper support, soil, and watering, vines grew faster than I anticipated.
- High yield: Each plant produced far more beans than I imagined.
- Pest resilience: Minimal intervention was needed, as beneficial insects helped keep pests under control.
- Community engagement: Villagers were curious and offered tips, making it a collaborative and educational experience.
These insights reinforced the value of patience, observation, and proper care in gardening.
Step 12: Why This Method Works
This approach works so well because it combines:
- Seed selection and spacing: Ensures strong, healthy plants.
- Support and vertical growth: Maximizes sunlight exposure and airflow.
- Proper watering and mulching: Prevents stress and promotes growth.
- Nutrient management: Ensures the plant has energy for continuous flowering and pod formation.
- Regular harvesting: Stimulates ongoing production.
By following these principles, even small village plots can produce an abundant supply of fresh string beans.
Final Thoughts
Growing string beans from seed to harvest in my village was an incredibly rewarding experience. I learned not only how to cultivate a nutritious and versatile vegetable but also how to observe nature, experiment with gardening techniques, and enjoy the fruits of patience and care.
For anyone considering growing string beans, this method is simple, practical, and highly effective. By paying attention to soil preparation, watering, fertilization, support, and harvesting, you can enjoy bountiful, continuous harvests.
Whether you live in a rural village, a small urban garden, or have just a balcony with containers, growing string beans can be an enjoyable, educational, and fruitful endeavor. Start from seed, follow the steps, and watch as your tiny seeds transform into a flourishing vine full of fresh, vibrant beans.