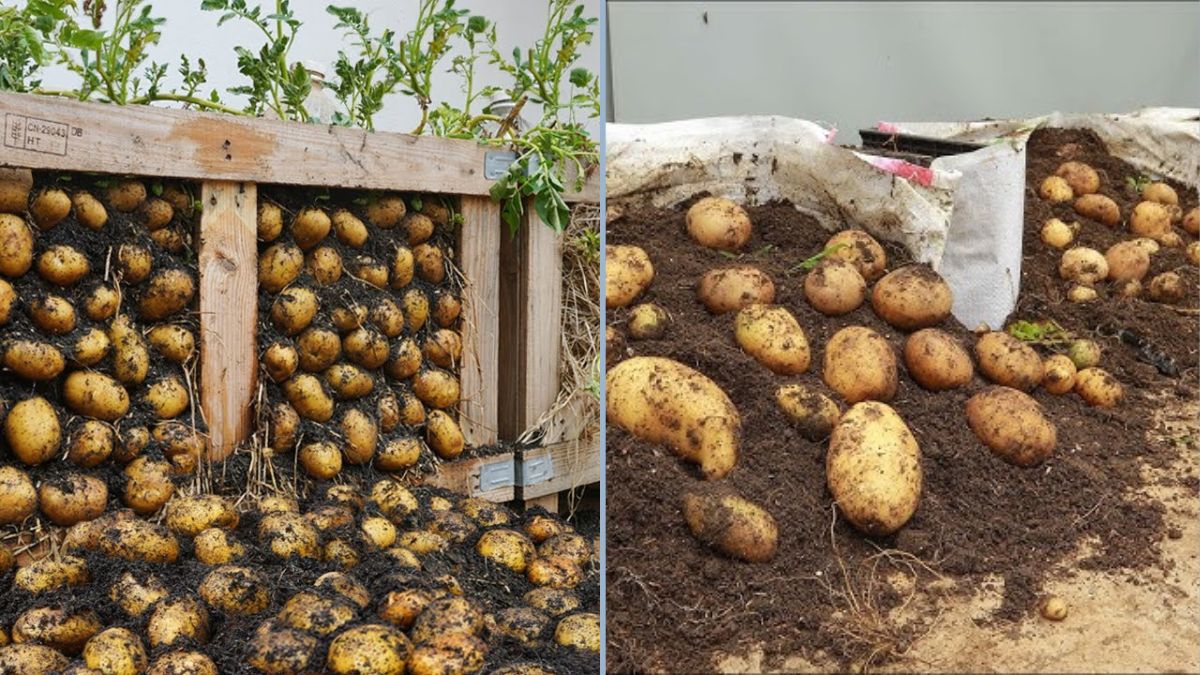
There are moments in gardening when something so simple works so brilliantly that it leaves you both amazed and inspired. That’s exactly what happened when the idea of growing potatoes on a pallet turned into a tuber-filled success. At first glance, a wooden pallet doesn’t look like the most obvious gardening tool, but when used creatively, it can become a powerhouse for producing food in small or unconventional spaces. This blog post explores how a humble pallet became the foundation for an unexpectedly abundant potato harvest—and how you can recreate the same success in your own garden.
Why a Pallet? The Inspiration Behind the Method
Wooden pallets are widely available, inexpensive, and often discarded after a single use. Their structure makes them ideal for vertical and compact gardening methods. Instead of planting potatoes in traditional raised beds or mounds, pallets provide a framework that helps conserve soil, improve drainage, and keep the crop organized. The original idea likely came from a desire to test something new—an experiment that turned out far better than expected.
When someone exclaimed, “I can’t believe it; growing potatoes on a pallet has so many tubers,” the surprise was both honest and relatable. No one expects a wooden pallet to outperform carefully prepared garden rows, yet here we are—celebrating a bumper crop from a DIY innovation.
Getting Started: Tools and Materials
You don’t need specialized equipment or expensive supplies to begin. Here’s what was used to set up the pallet potato grow:
- One wooden pallet (make sure it’s heat-treated and safe for gardening)
- Seed potatoes (choose a reliable, disease-free variety)
- Loose, nutrient-rich soil or compost mix
- Straw, leaves, or mulch for covering
- Landscape fabric or cardboard (optional, for lining)
- A sunny location with at least 6–8 hours of light daily
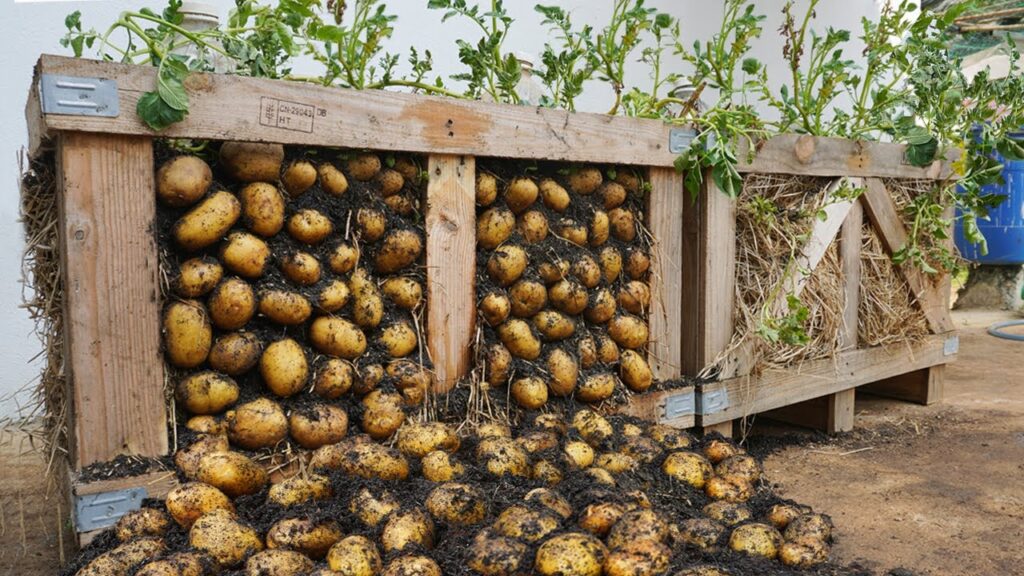
The pallet serves as the container, while soil fills the gaps. With a little stacking and mulching as the plants grow, you end up with a layered system that encourages tuber formation.
Preparing the Pallet for Planting
Step one is choosing a safe, untreated pallet. Look for an “HT” stamp, which means heat-treated rather than chemically processed. If you’re concerned about soil loss through the slats, you can line the inside with landscape fabric, burlap, or thick cardboard.
Lay the pallet flat on the ground, or stand it vertically if you’d prefer a space-saving approach. Many gardeners place it on a patch of bare ground or lawn so the roots can access the soil beneath if needed.
Next, fill the pallet with a rich mixture of compost and well-draining garden soil. Since potatoes prefer loose soil, avoid heavy clay or compacted dirt. Level the top and make sure it fills the spaces between the boards.
Planting Your Seed Potatoes
Seed potatoes are usually cut or planted whole depending on size. Place them in the soil-filled pallet, spacing them evenly across the surface. A typical pallet can hold anywhere from 6 to 12 seed pieces, depending on the layout and gaps.
Here’s the trick: cover the potatoes lightly at first—just enough soil to tuck them in. As the sprouts emerge and stems begin to grow, add more soil or straw to “hill” the plants. This encourages the stems to produce additional tubers along their buried parts.
Mulching, Hilling, and Maintenance
One of the secrets to the high number of tubers is consistent hilling and mulching. Each time the plants grow 4-6 inches taller, mulch around them with straw, compost, or a mix of both. This supports the stems and keeps the pallet structure from drying out.
Watering:
Potatoes need steady moisture, but pallets don’t hold water like raised beds. A weekly deep watering—or more in hot weather—is usually sufficient, as long as drainage is good.
Fertilizing:
Though potatoes aren’t heavy feeders, a compost top-up mid-season can help boost tuber production. Avoid high-nitrogen fertilizers as they encourage leafy growth over root development.
Sunlight and Airflow:
With the slatted design of pallets, air circulation is naturally improved. This reduces the risk of rot or fungal issues. Full sun helps maximize photosynthesis and growth.
Watching the Progress
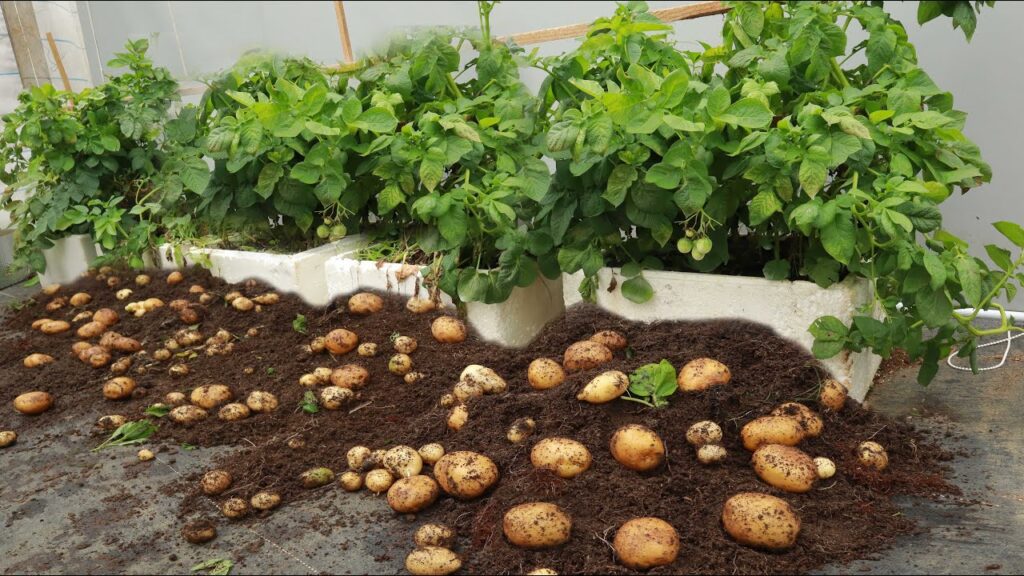
One of the most satisfying parts of growing potatoes in this way is seeing how clean and well-formed the plants look compared to in-ground beds. Their stems poke up through the soil and straw, and the pallet acts almost like an invisible frame guiding their structure.
As weeks pass, the plants become bushy and lush. The real surprise, however, waits beneath. Many gardeners assume the yields will be modest in such a confined space—but the payoff often defies expectations.
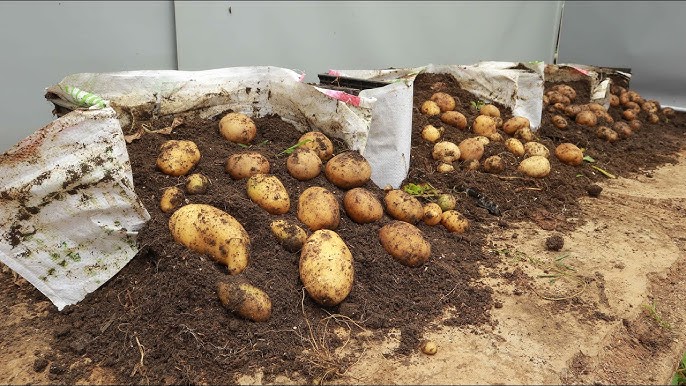
The Harvest Surprise
When it comes time to harvest, there’s a mix of anticipation and skepticism. Could a pallet really support substantial tuber growth?
The answer: absolutely. Pulling back the straw and lifting the soil often reveals clusters of potatoes tucked into every nook and cranny. Instead of getting a few small tubers, you might find an abundance—dozens of potatoes forming along the buried stems.
By the end of the process, it’s easy to understand the sentiment: “I can’t believe it; growing potatoes on a pallet has so many tubers!” The surprise is genuine, especially when compared to expectations for such a minimal setup.
Why the Method Works So Well
Several factors contribute to the success of pallet-grown potatoes:
- Improved Drainage:
Water doesn’t pool, reducing the risk of rot. - Airflow and Soil Aeration:
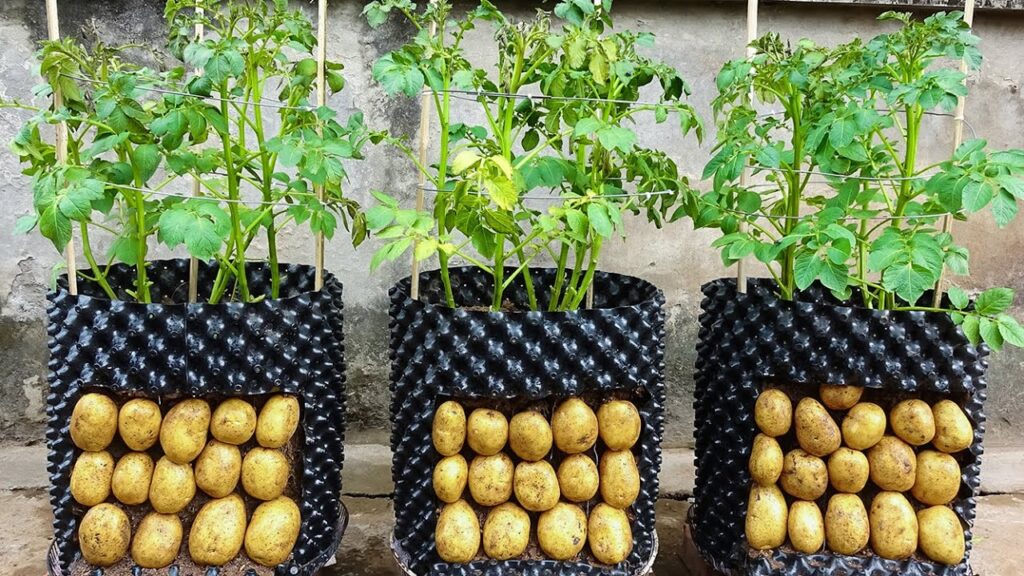
The gaps help oxygen circulate, keeping roots healthy. - Vertical Space Utilization:
Hilling along the plane of the pallet allows tubers to form upward, not just outward. - Heat Retention:
Wooden slats absorb and maintain warmth, promoting quicker growth. - Pest Protection:
Slug damage and soil-borne disease risks may be reduced by elevation and structure.
Ideal Potato Varieties for Pallet Planting
Not all varieties produce the same results, but many common types respond well to this method. Some excellent choices include:
- Yukon Gold
- Red Pontiac
- Kennebec
- Russet Burbank
- Purple Majesty
Early-maturing varieties or mid-season types often perform best in compact systems.
Tips for Success
If you’re thinking of trying this method, keep these tips in mind:
- Start with quality seed potatoes.
- Use loose, organic-rich soil.
- Hill the plants regularly.
- Check moisture frequently.
- Choose a pallet with good structural integrity.
- Place it in a sunny, accessible spot.
A little care goes a long way in boosting yields.
Beyond One Harvest: Reuse and Rotation
After harvesting, you can reuse the pallet for another potato crop or repurpose it for growing herbs, flowers, or greens. If the wood begins to break down, simply use parts as mulch or compostable material.
For crop health, avoid planting potatoes in the same pallet soil for multiple years in a row. Rotation helps prevent disease and nutrient depletion.
The Takeaway: Small Space, Big Results
What began as a curiosity turned into a surprising success story. Growing potatoes on a pallet proves that innovation and resourcefulness can transform even the most ordinary objects into food-growing systems. For gardeners with limited space, poor soil conditions, or a love of DIY experiments, pallet planting opens up new opportunities.
From the first sprout to the moment of lifting the straw and revealing heaps of tubers, the process blends practicality with delight. It challenges old assumptions and encourages us to rethink how we use the materials around us.
So if you’re searching for an imaginative and effective way to grow your next potato crop, don’t overlook that old pallet leaning against the shed. You might just find yourself saying, “I can’t believe it either!” when harvest time rolls around.