If you’ve ever strolled through the produce section and admired the earthy orange glow of sweet potatoes, you might have wondered — could I grow these myself?
The answer is a resounding yes! Growing sweet potatoes at home is surprisingly easy, cost-effective, and incredibly rewarding. Even better — you don’t need to start with expensive seed potatoes. You can grow your own lush sweet potato vines and harvest delicious tubers right from store-bought sweet potatoes.
In this complete guide, we’ll walk you through every step — from choosing the right potato to harvesting and curing — so you can enjoy your own sweet, homegrown bounty.
Why Grow Sweet Potatoes from Store-Bought Ones?

Sweet potatoes are one of the most forgiving crops for beginner gardeners. They’re resilient, thrive in warm climates, and produce abundantly with minimal care. Using store-bought potatoes as your starting point has several advantages:
- Easy to Find: No need to hunt down specialty seed suppliers.
- Budget-Friendly: A single potato can yield multiple plants (called slips).
- Sustainable: Reduce food waste by turning old potatoes into new crops.
- Fun Experiment: Watch the transformation from a humble root to a thriving vine.
That said, not all store-bought sweet potatoes will sprout easily, so let’s start by picking the right one.
Step 1: Choosing the Right Sweet Potato
When selecting your starter potato, keep these points in mind:
- Go Organic: Many conventionally grown sweet potatoes are treated with sprout inhibitors to prolong shelf life. Choose organic ones to ensure they’ll sprout properly.
- Healthy Appearance: Look for firm, unblemished roots without soft spots or mold.
- Variety Matters: There are many types of sweet potatoes — orange, purple, white, and even red-skinned varieties. Choose one that suits your climate and taste preferences.
If you’re unsure what grows best in your area, local gardeners or agricultural extensions can offer great insight.
Step 2: Sprouting Sweet Potato Slips
Sweet potatoes don’t grow from seeds like regular potatoes — they grow from slips, which are shoots that sprout from the tuber. Here’s how to produce them:
Method 1: The Water Method (Classic Jar Technique)
- Cut your sweet potato in half or keep it whole if small.
- Insert toothpicks around the middle and suspend it in a jar of water — half submerged, half above the water line.
- Place the jar in a warm, sunny spot (ideally 75–85°F or 24–29°C).
- Change the water every few days to prevent rot.
- After 2–4 weeks, you’ll see shoots (slips) and roots forming.
Method 2: The Soil Method (More Natural)
- Fill a tray or shallow pot with moist potting soil.
- Lay the sweet potato on its side and cover it halfway with soil.
- Keep the soil consistently moist and warm.
- Shoots will emerge in about 2–3 weeks.
Once your slips reach about 6–8 inches long and have a few leaves, they’re ready to be separated and rooted.
Step 3: Rooting and Preparing Your Slips
When your slips are long enough:
- Gently twist or cut them off from the parent potato.
- Remove the lower leaves, leaving just a few at the top.
- Place the slips in a jar of clean water so the lower part is submerged.
- Within a week, roots will form — white, delicate, and ready for soil.
Once the roots are about 1–2 inches long, your slips are ready to plant in the ground or containers.
Step 4: Planting Sweet Potatoes
Sweet potatoes love warm weather, so wait until all danger of frost has passed and soil temperatures are above 60°F (15°C). Choose a sunny location with loose, well-draining soil — sandy loam is ideal.
How to Plant:
- Loosen the Soil: Sweet potatoes grow underground, so give them plenty of space by tilling or digging at least 12 inches deep.
- Add Compost: Mix in organic compost for nutrient-rich, airy soil.
- Create Mounds or Ridges: Form small hills 8–12 inches high and space them about 12–18 inches apart.
- Plant the Slips: Bury the rooted end 3–4 inches deep, leaving several leaves above the surface.
- Water Well: Give them a generous drink to settle the soil.
Step 5: Caring for Your Sweet Potato Plants
Sweet potatoes are fairly low-maintenance once established, but consistent care helps you achieve a generous harvest.
Watering:
- Water deeply once or twice a week.
- Avoid overwatering — soggy soil can cause rot.
- Reduce watering as harvest time approaches to promote dry, firm tubers.
Fertilizing:
- Use a balanced organic fertilizer or compost tea every 3–4 weeks.
- Avoid nitrogen-heavy fertilizers — they’ll promote leafy growth instead of tubers.
Weed & Mulch:
- Keep the bed weed-free in the early stages.
- Mulch with straw or leaves to retain moisture and prevent weeds.
Step 6: Watching Them Grow
As the weeks go by, your slips will transform into sprawling vines that creep along the ground. These vines can easily reach several feet, creating a lush green carpet.
Don’t worry if you don’t see much happening underground — sweet potatoes take about 90–120 days to mature, depending on the variety.
If you notice flowers, that’s normal too! Though not all plants bloom, flowering can indicate healthy growth.
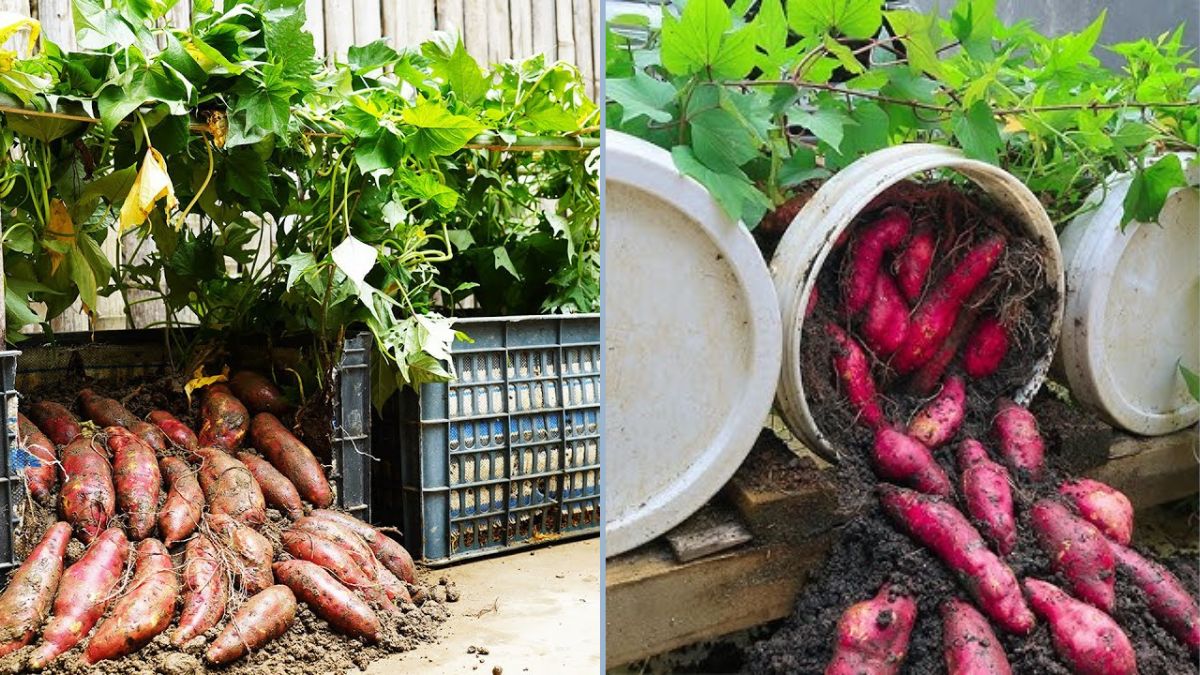
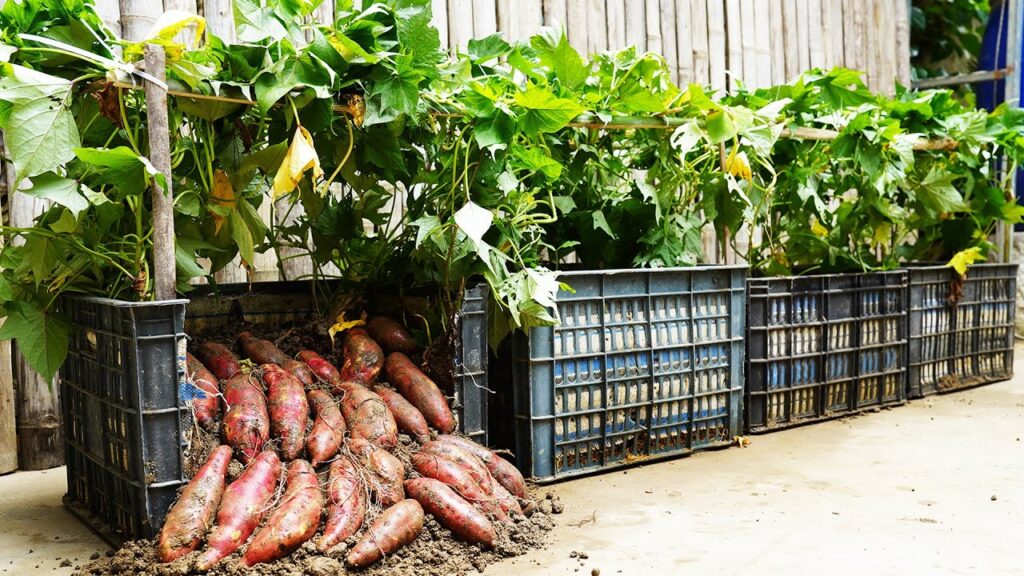
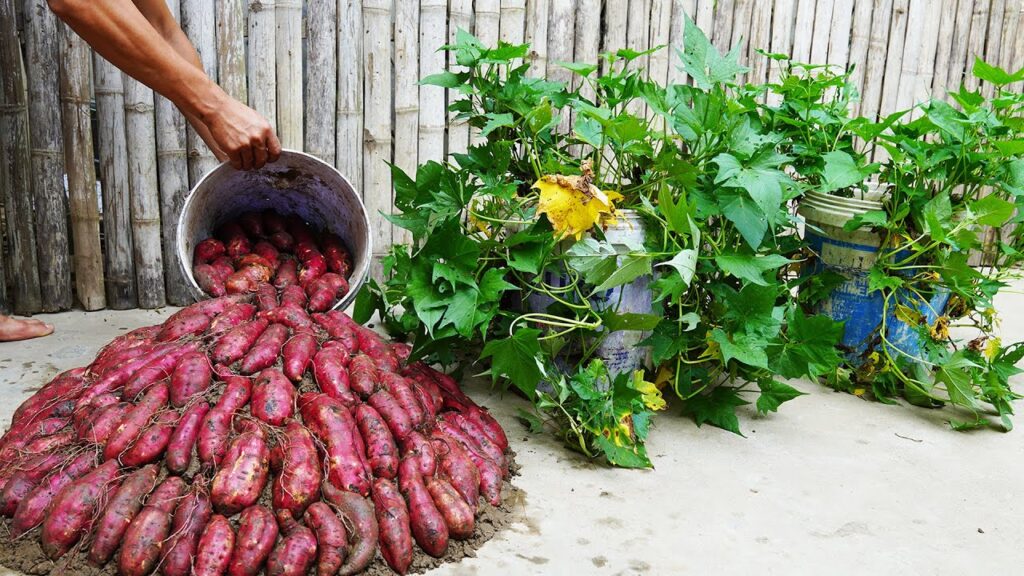
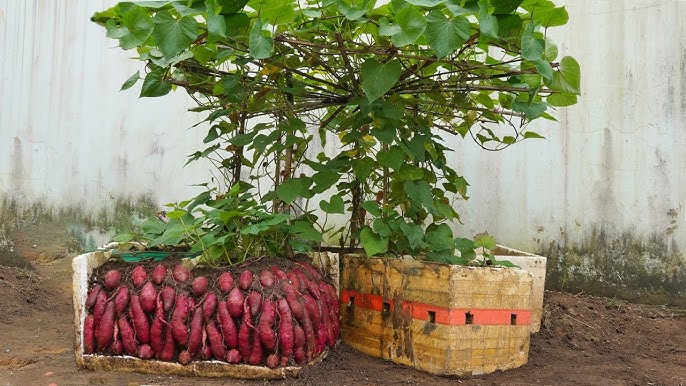
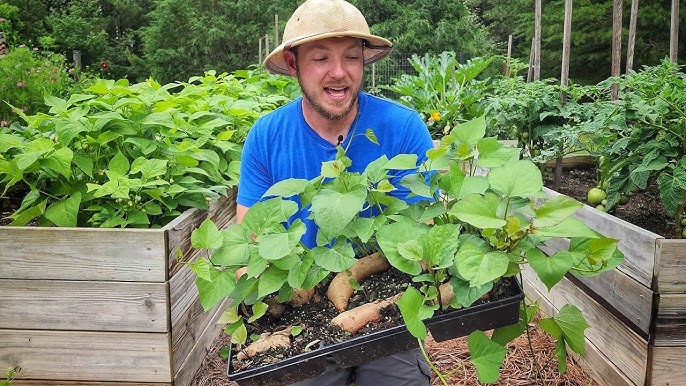
Step 7: Harvesting Sweet Potatoes
You’ll know it’s time to harvest when the leaves start to yellow and the vines begin to die back. Typically, this happens in late summer or early fall.
How to Harvest:
- Use a garden fork or hands to gently loosen the soil around the plants.
- Lift the tubers carefully to avoid bruising.
- Shake off excess dirt — don’t wash them yet.
Handle them delicately; freshly dug sweet potatoes are quite fragile.
Step 8: Curing Sweet Potatoes for Maximum Sweetness
Curing is the secret to those rich, sugary flavors we love in baked or roasted sweet potatoes.
Here’s how to cure them properly:
- Place your harvested sweet potatoes in a warm, humid environment — around 80–85°F (26–29°C) and 85–90% humidity.
- Cure for 7–10 days.
- After curing, store them in a cool, dark, and dry place (around 55–60°F or 13–16°C).
During curing, starches convert into sugars — enhancing both flavor and shelf life. Properly cured sweet potatoes can last for up to a year in storage!
Bonus Tips for Success
- Rotate your crops: Avoid planting sweet potatoes in the same soil two years in a row to prevent pest buildup.
- Watch for pests: Common threats include wireworms, nematodes, and whiteflies. Natural deterrents like neem oil or crop rotation help keep them in check.
- Grow in containers: Limited space? Large pots or grow bags work well. Just ensure they’re deep (at least 12–18 inches).
- Save your own slips: At the end of the season, keep a few small tubers to start slips for next year!
Why You’ll Love Homegrown Sweet Potatoes
There’s something magical about pulling a cluster of sweet, orange tubers from the soil you nurtured yourself. Beyond their beauty, sweet potatoes are:
- Nutrient-Dense: Packed with fiber, vitamin A, potassium, and antioxidants.
- Versatile in the Kitchen: Perfect for fries, soups, pies, and even smoothies.
- Beautiful Plants: Their vines double as ornamental greenery for gardens or patios.
Once you’ve grown your first batch, you’ll never look at store-bought sweet potatoes the same way again.
Final Thoughts
Growing sweet potatoes from store-bought ones is more than just a gardening hack — it’s a rewarding journey from kitchen to garden and back again. With just one potato, a little patience, and basic care, you can cultivate an abundant crop that nourishes both your body and your love for gardening.
So next time you spot a sweet potato sprouting on your counter, don’t toss it — plant it!
Your garden (and your dinner table) will thank you.