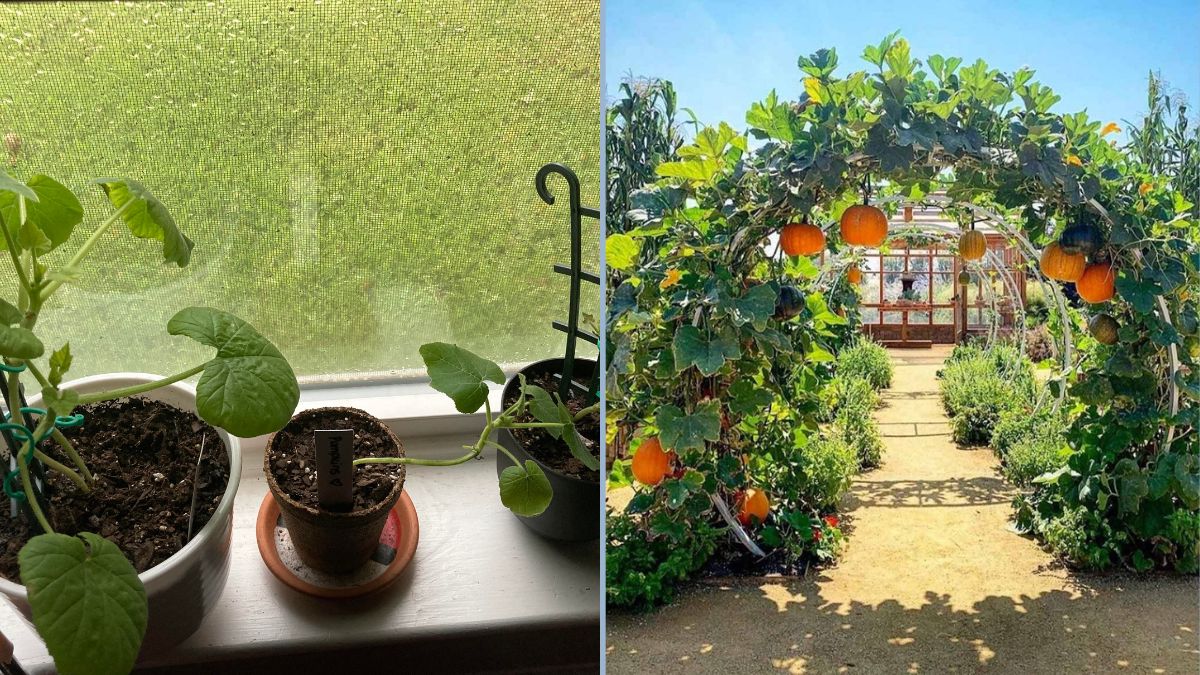
Growing your own pumpkins from seeds at home is one of the most rewarding gardening experiences you can have. Whether you have a backyard, balcony, or a small patch of soil, with a little patience and care, you can enjoy the entire journey — from planting a single seed to harvesting large, bright-orange pumpkins.
In this comprehensive guide, we’ll cover everything you need to know about growing pumpkins from seeds — including soil preparation, seed germination, transplanting, care, and harvesting. Let’s get started!
Why Grow Pumpkins at Home?
Pumpkins are not only delicious and nutritious, but they also bring a vibrant touch to your home garden. They are rich in vitamins A and C, fiber, and antioxidants. Homegrown pumpkins can be used for cooking soups, curries, pies, or even roasted seeds for snacks. Plus, watching the vines spread and flowers bloom is a wonderful experience for gardeners of all ages.
Growing pumpkins at home also allows you to:
- Control the use of fertilizers and pesticides.
- Choose organic growing methods.
- Save money by producing your own seeds for the next season.
- Reduce waste by composting pumpkin scraps back into your garden.
Step 1: Understanding Pumpkin Seeds
Pumpkins belong to the Cucurbitaceae family — the same family as cucumbers, melons, and squash. Their seeds are large, flat, and oval-shaped. When choosing seeds, it’s important to decide what kind of pumpkin you want to grow.
Types of Pumpkin Varieties:
- Miniature Pumpkins – Great for small spaces and decorative purposes.
- Sugar Pumpkins – Perfect for pies and cooking.
- Giant Pumpkins – Ideal if you want to compete in size or use for carving.
- Ornamental Pumpkins – Grown mostly for decoration.
You can either buy certified seeds from a nursery or save seeds from a ripe pumpkin you’ve eaten. Just make sure the pumpkin is not a hybrid variety (as hybrid seeds don’t always grow true to the parent plant).
Step 2: Preparing the Seeds
If you’re using fresh seeds from a pumpkin, clean them thoroughly to remove pulp and fibers. Then:
- Rinse the seeds in water.
- Dry them on a paper towel for 2–3 days in a cool, airy place.
- Select the healthiest, largest seeds for planting.
For faster germination, you can soak the seeds in warm water for 8–12 hours before planting. This softens the outer shell and speeds up sprouting.
Step 3: Choosing the Right Location
Pumpkins are sun-loving plants that require 6–8 hours of direct sunlight daily. Choose a location that’s open, warm, and well-drained. If you’re growing pumpkins in containers or pots, make sure they’re large — at least 18–24 inches deep and wide.
Pro Tip:
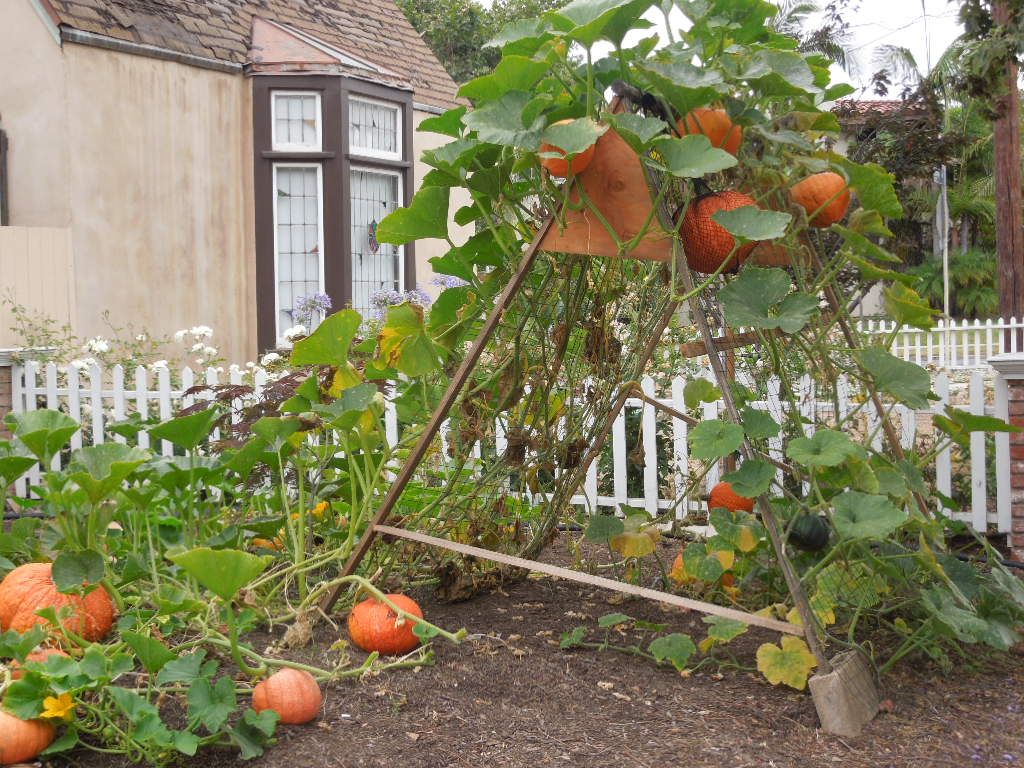
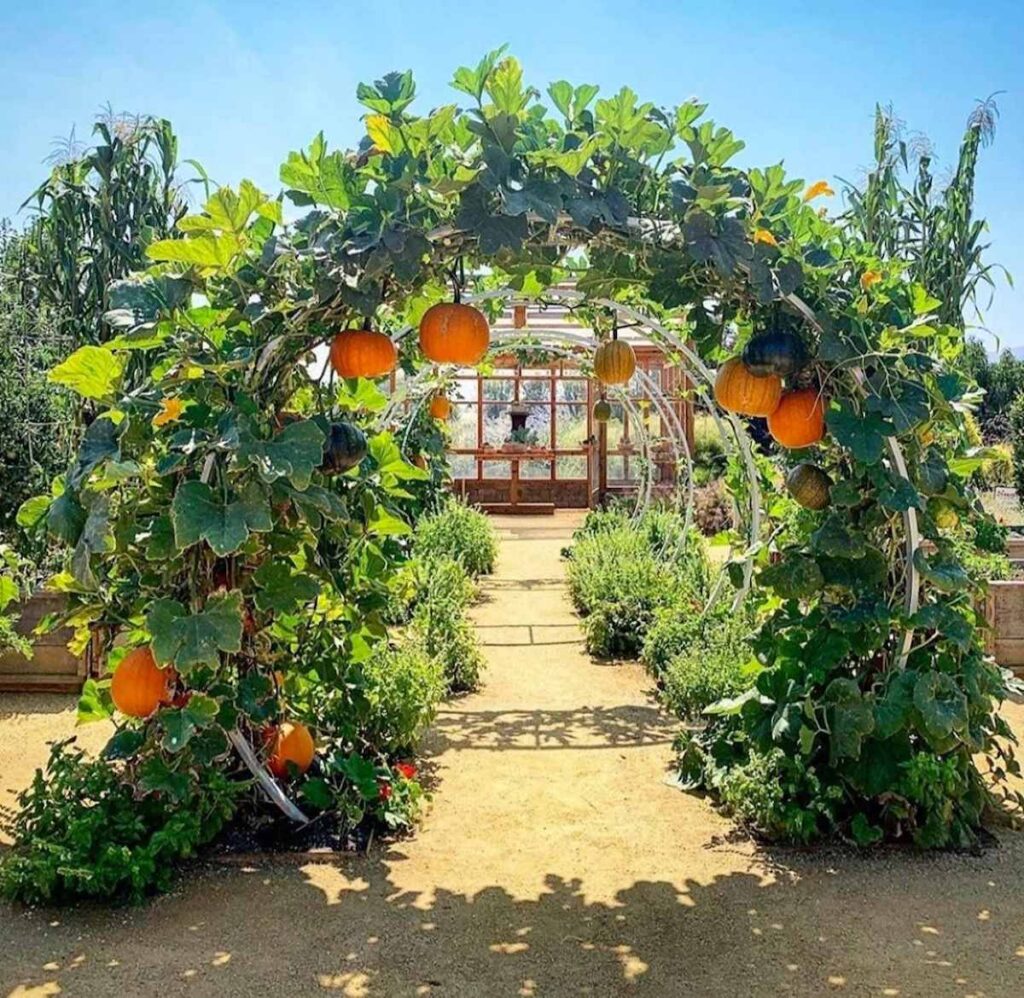
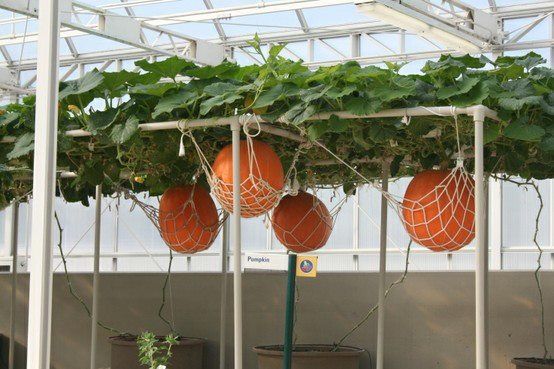
Pumpkin vines spread widely, so give them space. If space is limited, consider growing smaller varieties or training vines to climb trellises.
Step 4: Soil Preparation
Pumpkins thrive in rich, well-drained loamy soil with a pH between 6.0 and 7.5. Before planting, enrich the soil with organic matter such as compost or well-rotted manure. This not only improves fertility but also helps retain moisture.
Here’s a simple soil mix for container growing:
- 40% garden soil
- 30% compost or organic manure
- 20% coco peat (for moisture retention)
- 10% sand (for drainage)
Mix well before planting.
Step 5: Planting the Seeds
Pumpkin seeds can be sown directly in the ground or started indoors in small pots.
Direct Sowing Method:
- Create small mounds or “hills” about 3 feet apart.
- Sow 2–3 seeds per mound, about 1 inch deep.
- Water gently but thoroughly.
- Once seedlings emerge (in about 7–10 days), thin them to leave the healthiest plant per mound.
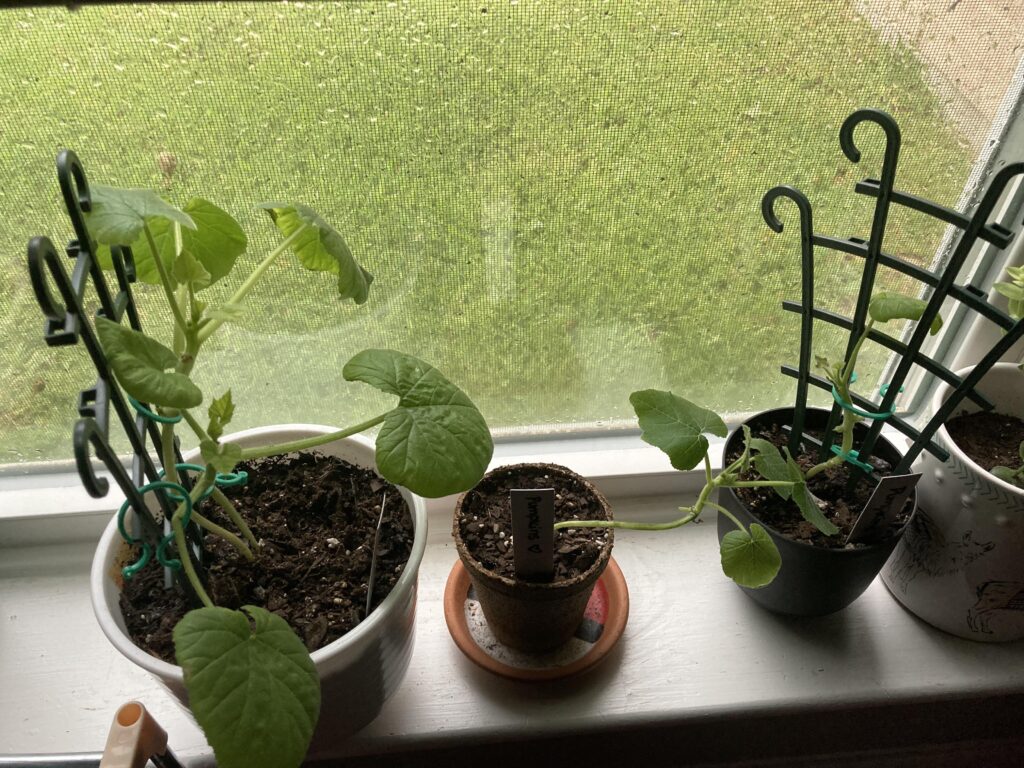
Indoor Sowing (for Early Start):
- Fill small biodegradable pots with potting mix.
- Plant one seed per pot, 1 inch deep.
- Keep them in a warm, sunny spot.
- Transplant seedlings outdoors once they have 2–3 true leaves and the weather is warm.
Step 6: Caring for Your Pumpkin Plants
Pumpkin plants grow fast and need consistent care. Follow these simple steps to ensure healthy growth.
1. Watering:
Keep the soil moist but not soggy. Water deeply once every 2–3 days, preferably in the morning. Avoid wetting the leaves to prevent fungal infections.
2. Mulching:
Add mulch (straw, dried leaves, or grass clippings) around the base to retain moisture, prevent weeds, and regulate temperature.
3. Fertilization:
Feed your pumpkin plants every 2–3 weeks. Use a balanced fertilizer (10-10-10 NPK) during early growth. Once flowers appear, switch to a fertilizer higher in phosphorus and potassium to promote blooming and fruit development.
4. Pruning:
Trim excess side vines to focus the plant’s energy on producing fewer but larger pumpkins. Remove dead or diseased leaves regularly.
5. Pollination:
Pumpkins have separate male and female flowers. Male flowers appear first, followed by female ones (with a small swelling at the base). Bees are the main pollinators, but if pollination is poor, you can hand-pollinate:
- Use a soft brush or cotton swab to transfer pollen from the male flower to the female flower’s center.
Step 7: Managing Pests and Diseases
Pumpkins are prone to certain pests like aphids, cucumber beetles, and squash bugs. They can also suffer from powdery mildew or leaf spots.
Common Solutions:
- Spray neem oil or organic insecticidal soap weekly.
- Avoid overwatering and ensure good air circulation.
- Remove any infected leaves immediately.
- Rotate crops every season to prevent soil-borne diseases.
Tip: Companion planting with marigolds or basil can naturally repel pests.
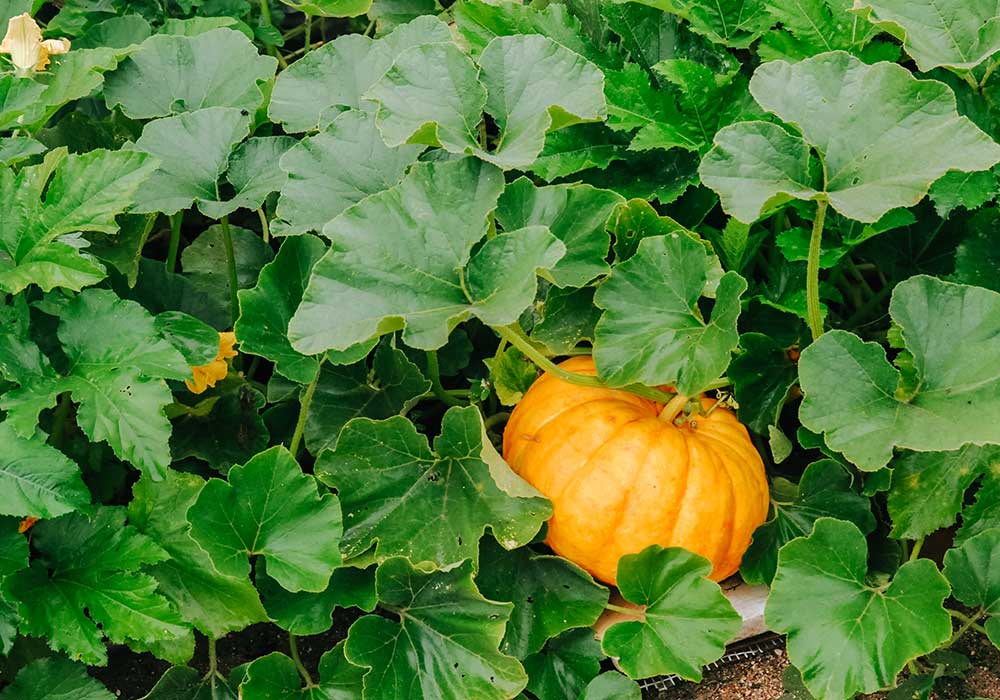
Step 8: Flowering and Fruit Development
After successful pollination, you’ll notice tiny pumpkins forming at the base of female flowers. Over the next several weeks, these will grow rapidly. Make sure to:
- Support the growing fruits with straw or cardboard underneath to avoid rotting.
- Continue regular watering and feeding.
- Limit each plant to 2–3 fruits for the best size and quality.
Step 9: Harvesting Pumpkins
Pumpkins usually take 90–120 days to mature after sowing. You’ll know they’re ready for harvest when:
- The color turns deep orange or the variety’s mature shade.
- The rind becomes hard and cannot be easily punctured with your fingernail.
- The stem starts drying and turning brown.
How to Harvest:
Cut the pumpkin from the vine with a sharp knife or pruning shears, leaving about 2–3 inches of stem attached. This helps prevent rot and extends shelf life.
After harvesting, cure the pumpkins by placing them in a warm, dry, and well-ventilated area for 7–10 days. This process toughens the skin and improves storage quality.
Step 10: Saving Seeds for Next Season
Don’t throw away your pumpkin seeds! You can save them for your next planting season.
- Scoop out the seeds and rinse thoroughly.
- Spread them on a paper towel to dry for 7–10 days.
- Store in a labeled, airtight container in a cool, dark place.
Properly stored seeds can last for 3–5 years!
Bonus Tips for Home Gardeners
- Container Growing: Choose bush or dwarf pumpkin varieties for pots.
- Vertical Gardening: Use trellises or fences to train vines upward — perfect for small gardens.
- Composting: Pumpkin leaves and vines make excellent compost material after harvest.
- Organic Boost: Add compost tea or seaweed extract every few weeks for healthier growth.
Conclusion
Growing pumpkins from seeds at home is an exciting, hands-on way to connect with nature and enjoy the fruits of your labor. From a tiny seed sprouting into a sprawling vine to finally harvesting your bright orange pumpkin — it’s a journey that brings immense satisfaction.
With the right soil, sunlight, and care, anyone can grow pumpkins, even in limited space. Follow the propagation steps carefully, be patient, and soon you’ll have beautiful, homegrown pumpkins ready to decorate, cook, or share with friends and family.
Final Tip: Start your pumpkin seeds early in the warm season and give them space to sprawl — they’ll reward you with a bountiful harvest and a truly magical gardening experience!