Starting spring seeds indoors is one of the most effective techniques for ensuring an early and productive harvest. This practice allows gardeners and small-scale growers to control environmental conditions, extend the growing season, and protect seedlings from unpredictable outdoor temperatures. For regions with prolonged winters or short growing periods, indoor seed starting provides a valuable head start. This article presents a comprehensive, plant-based, and eco-friendly guide to starting seeds indoors without using any non-vegetarian materials.
Benefits of Starting Seeds Indoors
Growing seeds indoors offers multiple advantages:
- Early Harvest: Plants gain several weeks of growth before outdoor planting.
- Protection from Frost: Seedlings avoid cold snaps and frost damage during early spring.
- Cost-Effective: Sowing seeds indoors is often cheaper than buying nursery-grown transplants.
- Stronger Plants: Seedlings develop better roots and adapt more easily when transplanted.
- Greater Variety: Gardeners can choose heirlooms and organic seeds not easily available in markets.
Choosing the Right Seeds for Indoor Sowing
Not every plant benefits equally from indoor seed starting. Selecting suitable vegetables, herbs, and flowers is the first step. Some ideal candidates include:
- Tomatoes
- Peppers
- Eggplants
- Broccoli
- Cauliflower
- Lettuce
- Kale
- Spinach
- Basil
- Cilantro
- Marigold
Plants with long growing periods or slower germination benefit the most from an indoor start.
Planning and Timing
Timing determines how successful the indoor seeding process will be. Most seeds should be started 4 to 10 weeks before the last expected frost date in your region. For example:
- Tomatoes and peppers: 6–8 weeks before transplant
- Lettuce and spinach: 4–6 weeks
- Broccoli and cauliflower: 5–7 weeks
- Herbs such as basil: 6–8 weeks
Creating a planting schedule ensures that seedlings are neither overgrown nor immature when it’s time to move them outdoors.
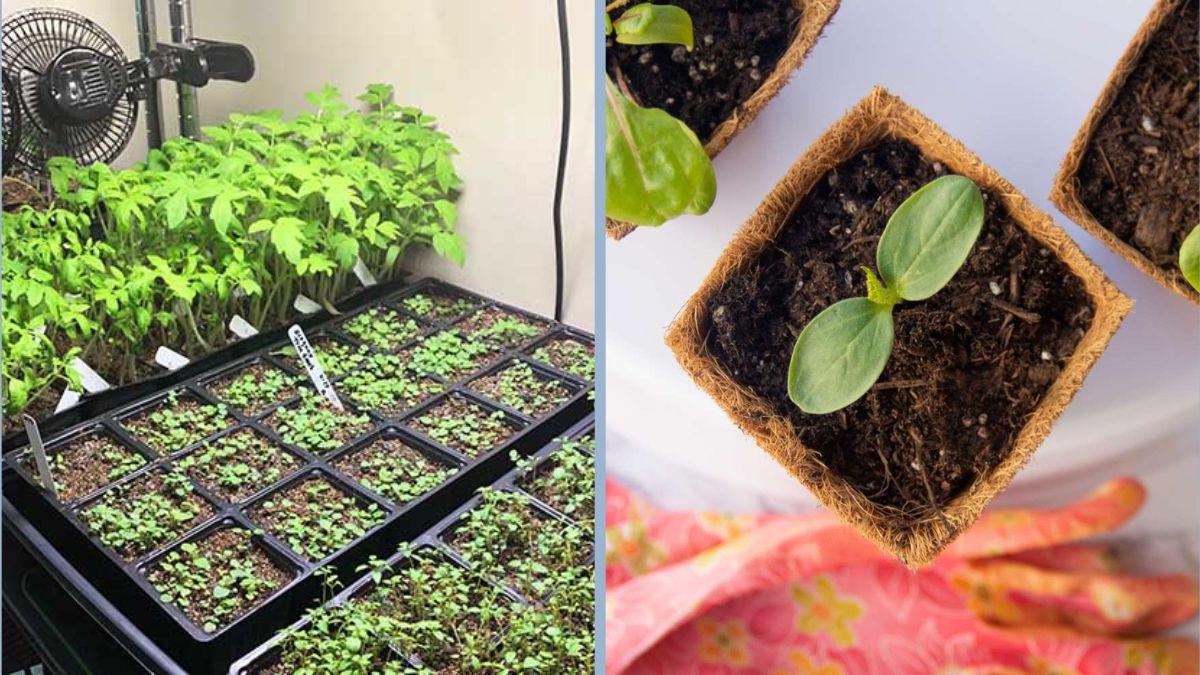
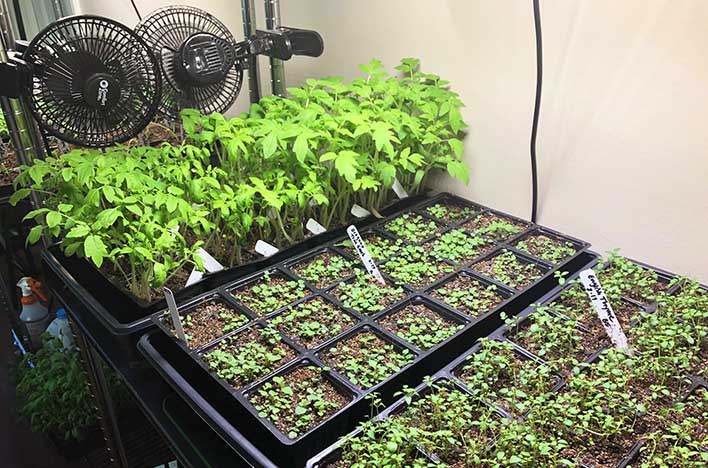
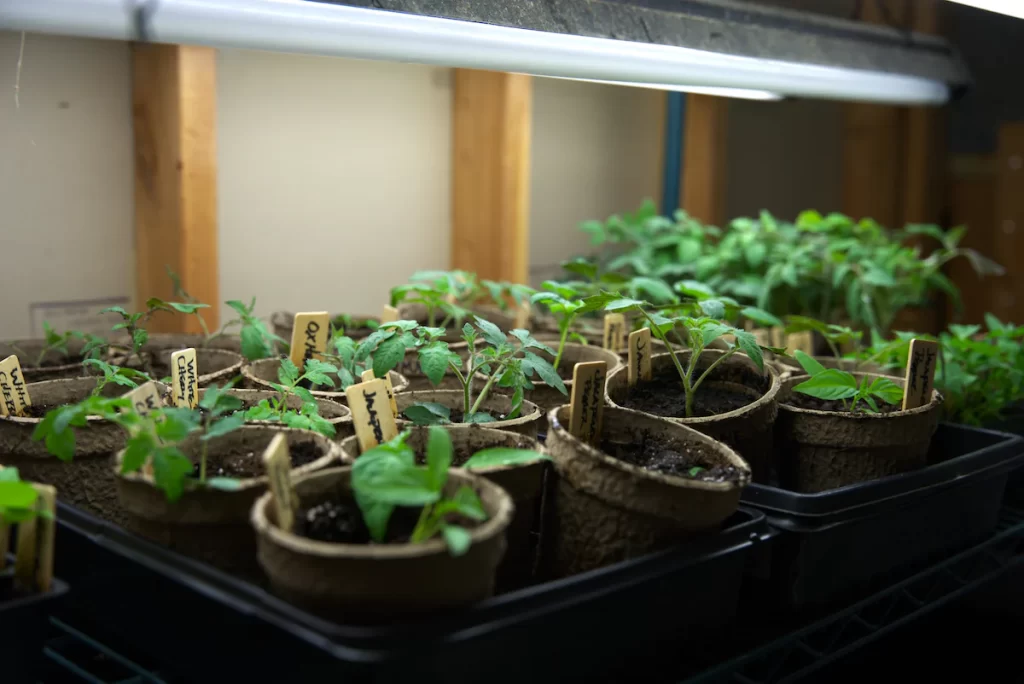
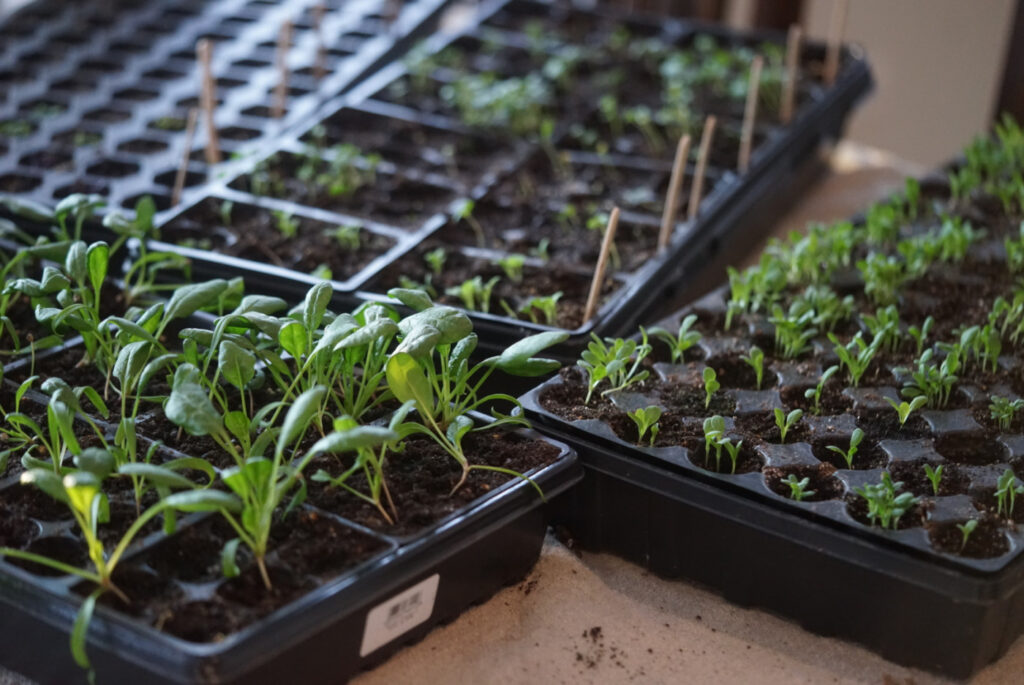
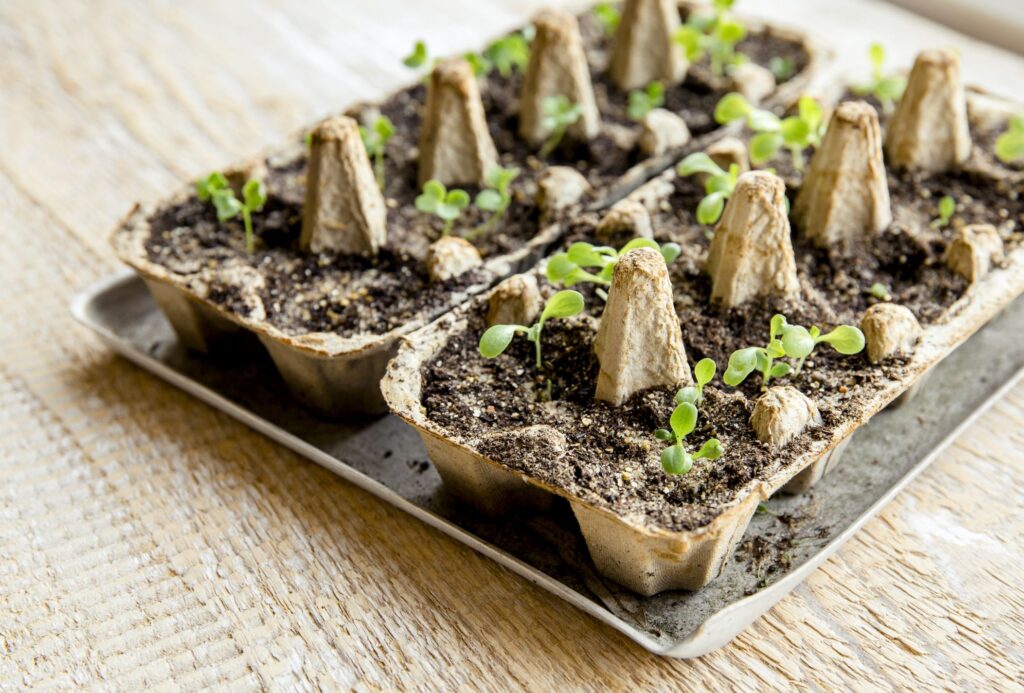
Selecting Containers for Seed Starting
Multiple container options are available and should be plant-safe, clean, and eco-friendly. Suitable choices include:
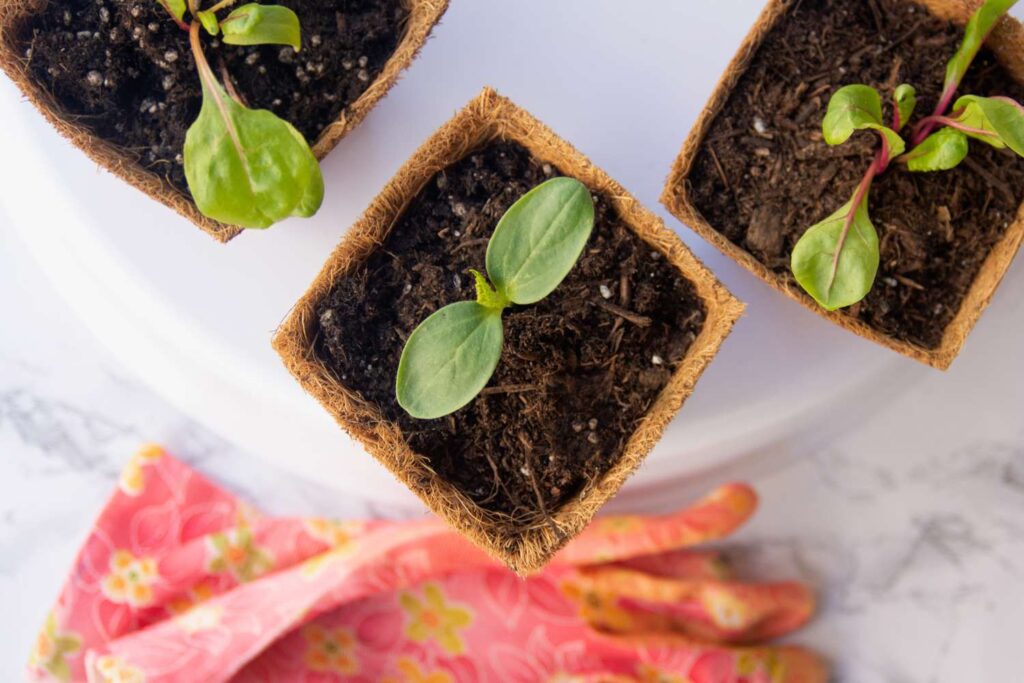
- Biodegradable pots made from coconut coir or peat-free fiber
- Recycled paper pots
- Egg cartons (plant-based pulp type)
- Reused plastic trays with drainage holes
- Reusable seed-starting trays with cell dividers
Drainage is critical to prevent fungal infection and root rot. Placing containers on waterproof trays allows easy watering and collection of excess moisture.
Using the Right Growing Medium
Garden soil is not ideal for indoor seed starting due to compaction, poor drainage, and possible pathogens. Instead, a sterile, light, plant-based starting mix should be used. Common organic components include:
- Coconut coir
- Vermiculite
- Perlite
- Compost (well-decomposed and sifted)
- Leaf mold
A good seed-starting medium should be airy, moisture-retentive, and nutrient-balanced. Avoid any animal-based composts or fertilizers if you want purely vegan-friendly gardening.
Filling and Preparing Containers
Steps for preparing containers:
- Moisten the growing mix lightly before filling.
- Fill containers gently without compacting the soil.
- Level the surface and add more mix if necessary.
- Ensure drainage holes are unobstructed.
Moistening the mix beforehand helps with even germination and prevents seeds from being displaced during watering.
Sowing the Seeds Properly
Seed depth and spacing are crucial for successful germination. A general guideline is to plant seeds at a depth equal to two to three times their diameter. Extremely small seeds can be pressed gently onto the surface without burying them completely.
Label each container with the plant name and sowing date. This helps track growth stages and prevents confusion when caring for multiple varieties.
After sowing, lightly mist or sprinkle water to ensure seed-to-soil contact.
Maintaining Moisture and Humidity
Seeds need consistent but not excessive moisture. Overwatering causes mold or damping-off disease, while dryness prevents germination. Ideal practices include:
- Using a spray bottle for light watering
- Maintaining moisture until seedlings emerge
- Covering trays with transparent lids or plastic film to retain humidity
- Ventilating daily to prevent fungal growth
Once seedlings sprout, covers should be gradually removed to reduce excess humidity.
Providing Adequate Light
Light is one of the most essential factors in seedling health. Weak lighting leads to leggy, pale, and weak sprouts. There are two main light sources:
- Natural Light
- Place trays near south-facing windows.
- Rotate containers regularly for even growth.
- Artificial Grow Lights
- Use LED or full-spectrum grow lights.
- Position lights 5–10 cm above seedlings.
- Provide 12–16 hours of light daily.
Elevating lights as the plants grow prevents scorching or stretching.
Managing Temperature and Ventilation
Most vegetable seeds germinate best between 18°C and 24°C (65°F–75°F). Some need slightly warmer temperatures. Steps to regulate temperature:
- Keep trays away from cold drafts.
- Use seedling heat mats for warmth (optional).
- Ensure gentle airflow to prevent mold.
Good ventilation reduces disease risk and strengthens seedlings by encouraging sturdy stems.
Fertilizing Seedlings
Seedlings do not need fertilizer until they develop their first true leaves. Once they appear, a plant-based diluted liquid fertilizer can be used. Options include:
- Compost tea
- Seaweed extract solution
- Soybean-based plant tonic
- Vermicompost liquid
Apply once every 1–2 weeks, following proper dilution instructions to avoid root burn.
Thinning Seedlings
If multiple seeds sprout in the same cell, thinning prevents overcrowding. Use small scissors to snip extra seedlings at soil level. Avoid uprooting by pulling, as it may damage nearby roots.
Thinning ensures that each plant has enough space for proper root and stem development.
Potting Up (Transplanting to Larger Containers)
As seedlings grow, their roots may outgrow the initial container. Signs include:
- Visible roots at drainage holes
- Slow growth
- Yellowing or wilting
Transplant into larger pots filled with fresh indoor mix. Hold seedlings gently by the leaves, not stems, and plant them at the same depth.
Hardening Off Seedlings
Before moving seedlings outdoors, acclimatization or “hardening off” is essential. This process usually takes 7–10 days:
- Place seedlings outside in a shaded area for 1–2 hours on the first day.
- Gradually increase exposure to sunlight, wind, and outdoor temperatures.
- Bring them back indoors at night during the early stages.
- Avoid exposing them to rain or harsh winds immediately.
Hardening improves resilience and prevents transplant shock.
Transplanting Outdoors
Once frost risks have passed and seedlings are hardened, they can be moved outdoors. Prepare the soil by:
- Loosening the top layers
- Removing weeds
- Mixing compost or plant-based organic matter
- Moistening the planting holes
Transplant seedlings in the evening or during cloudy weather to minimize stress. After planting, water gently and apply mulch to retain soil moisture.
Using Plant-Based Mulch for Protection
Mulching after transplant prevents moisture loss and supports early growth. Vegan-friendly mulch options include:
- Straw
- Dried leaves
- Sawdust
- Shredded bark
- Grass clippings (dried)
Mulch also helps maintain soil temperature and prevents weed growth.
Monitoring Early Growth After Transplant
The first two weeks after transplant are critical. Monitor seedlings for:
- Yellowing leaves
- Water stress
- Pest activity
- Temperature fluctuations
Provide cloth coverings or row covers if sudden cold nights are expected.
Conclusion
Starting spring seeds indoors is a strategic and sustainable approach to achieving early harvests, especially in regions with long winters or unpredictable weather. By using proper timing, plant-based growing mediums, adequate lighting, and careful transplanting practices, gardeners can boost productivity while maintaining an eco-friendly and cruelty-free approach. Hardening off, monitoring seedling development, and using natural fertilizers strengthen young plants and ensure successful outdoor establishment.
With planning, patience, and attention to detail, indoor seed starting becomes a rewarding process that enhances plant health and leads to abundant early yields—all without the use of non-vegetarian materials.