
Growing your own vegetables doesn’t require a backyard or fancy containers. With a little creativity and the right technique, you can grow fresh, crunchy radishes in something as simple as a plastic bottle. Radishes are fast-growing, low-maintenance, and perfect for beginners and urban gardeners. In this comprehensive guide, you’ll learn how to grow radishes in a bottle from seed to harvest—step by step—using affordable materials that you probably already have at home.
Whether you’re a gardening enthusiast, a balcony gardener, or someone looking for a school project or eco-friendly activity, radish-in-a-bottle gardening is both fun and rewarding. Let’s dive into everything you need to know!
Why Grow Radishes in a Bottle?
Growing radishes in a bottle is more than just a clever gardening trick—it offers several benefits:
- Space-Saving: Ideal for apartments and balconies.
- Cost-Effective: Reuses plastic bottles you might otherwise throw away.
- Quick Results: Most radish varieties mature in 25–35 days.
- Beginner-Friendly: Requires minimal care and grows easily.
- Educational: Great for kids to learn about plant growth and sustainability.
- Portable Garden: Move your bottle around to optimize sunlight.
Radishes have shallow roots and don’t demand large containers, making bottles perfect for growing them indoors or outdoors.
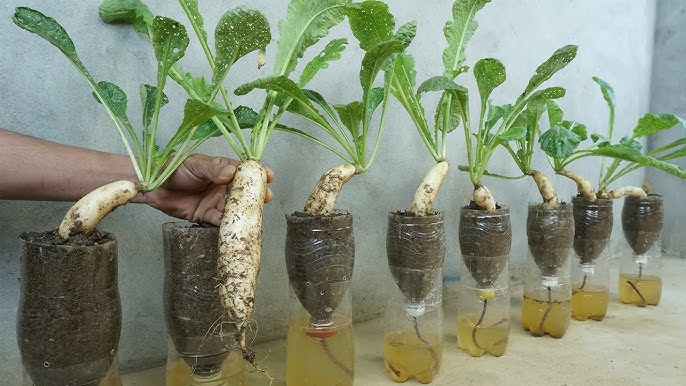
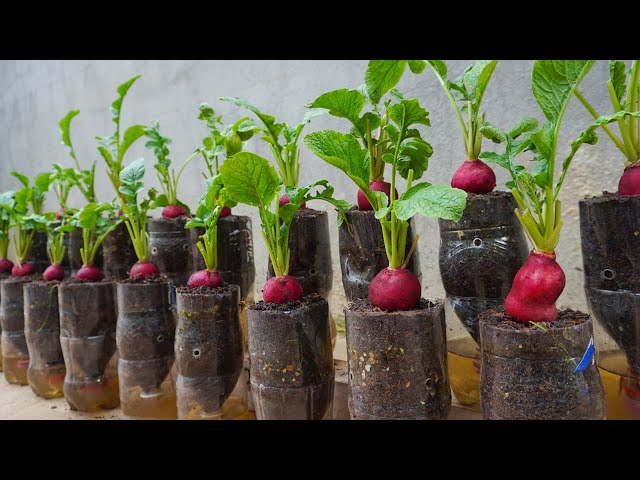
Choosing the Right Bottle
Most plastic bottles can work, but picking the right size will make your gardening more successful.
Best Options:
- 2-liter soda bottles – best for root space
- 1.5-liter water bottles – suitable for small radish varieties
- Wide-mouth bottles – easier to fill and sow in
- Tetra bottles or milk jugs (plastic) – also usable with some cuts
Key Preparation Steps:
- Clean the bottle thoroughly to remove any residue.
- Remove the label for better light and visibility.
- Create drainage holes at the bottom using a heated needle, scissors, or a hot nail.
- Cut an opening on the side or top (depending on the design you choose) for sowing, watering, and harvesting.
Soil Selection and Preparation
The right growing medium is crucial for radish growth. Avoid heavy soils that retain too much water.
Ideal Soil Mix:
- 50% garden soil or loamy soil
- 30% compost or well-rotted cow dung
- 20% river sand or coco peat
This ensures:
- Good drainage
- Soft soil structure for roots
- Proper nutrition
You can also use ready-made potting mix from garden stores if desired.
Filling the Bottle:
- Fill the bottle about 90% full.
- Tap gently to remove large air pockets.
- Leave about an inch at the top for watering space.
Positioning and Growing Conditions
Radishes thrive in cool to mildly warm weather and bright light.
Light Requirements:
- 4–6 hours of direct sunlight daily OR
- 8–10 hours of bright indirect light for indoor setups
Place the bottle near:
- A sunny windowsill
- Balcony ledge
- Rooftop
- Veranda or patio
Temperature Range:
- Ideal: 15°C–25°C (59°F–77°F)
- Avoid extreme heat or frost
If the weather is too hot, provide partial shade in the afternoon.
Sowing the Seeds
Radish seeds are small and easy to work with. Here’s how to sow them correctly:
- Moisten the soil lightly before planting.
- Make shallow holes about ½ inch (1–1.5 cm) deep.
- Drop 2–3 seeds per hole to ensure germination.
- Cover lightly with soil—don’t press too hard.
- Water gently with a spray bottle.
Spacing:
In a 2-liter bottle, you can sow about 5–7 seeds with 2-inch spacing. Avoid overcrowding so the roots can develop fully.
Watering Tips
Radishes need consistent moisture but not soggy soil.
Best Practices:
- Use a spray or watering can with a narrow spout.
- Water until the soil is evenly moist.
- Avoid waterlogging to prevent root rot.
- In hot weather, check moisture twice a day.
How to test: Press your finger into the soil. If the top inch is dry, it’s time to water.
Thinning the Seedlings
Once seeds germinate (usually in 4–6 days), you’ll need to thin the seedlings to prevent crowding.
- Wait until they grow 2–3 inches tall.
- Remove the weaker seedlings carefully using scissors or by gently pulling.
- Keep one healthy plant per spot for optimal root growth.
Don’t throw away the tiny leaves—you can use them in salads or compost them.
Fertilizing (Optional)
If your soil mix contains compost, you may not need extra fertilizer. However, a mild boost can improve root development.
Organic Options:
- Compost tea
- Vermiwash
- Diluted cow-dung solution (1:10 ratio)
- Seaweed extract (mild)
Apply every 10–12 days, and avoid excessive nitrogen that causes leafy tops with tiny roots.
Air Circulation & Drainage
Because bottles aren’t naturally breathable like clay pots, drainage and airflow matter more.
Tips:
- Check bottom holes occasionally to ensure they aren’t blocked.
- Tilt or elevate the bottle slightly to help extra water drain.
- Avoid placing bottles in sealed, humid corners.
Growth Timeline (Approximate)
| Day | Stage |
|---|---|
| 1–6 | Seed germination |
| 7–14 | Leaf development |
| 15–25 | Root bulbing begins |
| 25–35 | Harvest time (most varieties) |
Note: Some larger radish varieties may take 40–45 days.
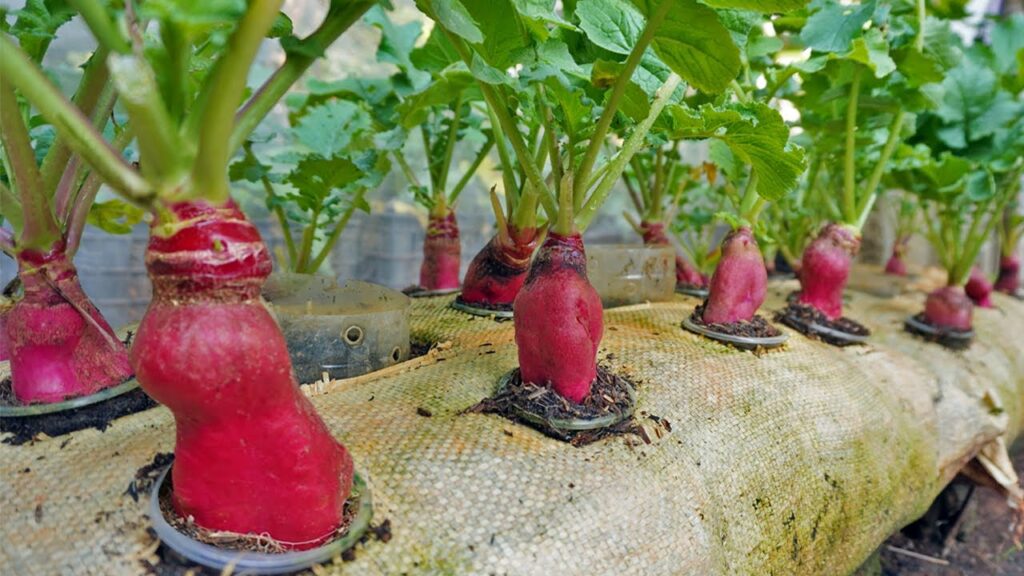
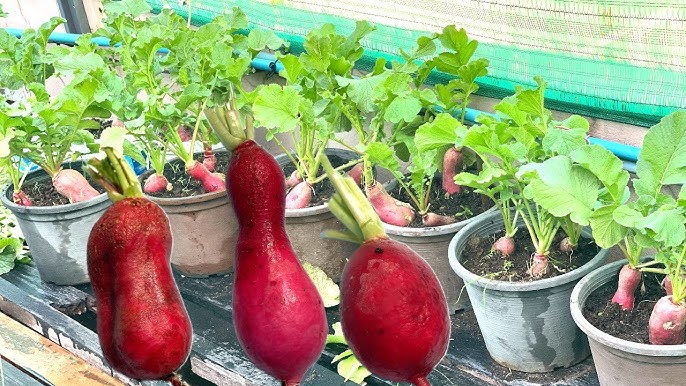
Harvesting Radishes in a Bottle
Harvesting is one of the most satisfying steps! You’ll know radishes are ready when:
- Roots swell visibly at the surface
- Leaves look mature and upright
- The plant is 3–5 inches tall (depending on the variety)
How to Harvest:
- Loosen the soil with your fingers.
- Hold the base of the plant gently.
- Pull slowly to avoid breaking the root.
- Rinse the radish in water to remove soil.
If some roots are still immature, leave them for a few more days.
Using Radishes and Greens
Radishes grown in bottles taste just as fresh as those from gardens. You can use them in salads, pickles, sandwiches, and stir-fries. The leafy tops (radish greens) are edible too and rich in vitamins.
Try using the greens in:
- Soups
- Smoothies
- Stir-fry dishes
- Pesto mixes
Reuse the Bottle for More Harvests
Don’t stop after one harvest. You can reuse the bottle to grow another batch:
- Remove leftover roots.
- Add fresh compost if nutrients are low.
- Loosen or replace the top layer of soil.
- Repeat the sowing process.
Radish seeds can be sown in cycles to enjoy a continuous supply.
Eco-Friendly and Fun for All Ages
Growing radishes in a bottle promotes environmental awareness by reusing plastic containers. It’s a fantastic project for:
- Kids and students
- Small-space gardeners
- Kitchen garden enthusiasts
- DIY and homesteading fans
You can even grow multiple bottles and hang them vertically for a space-saving garden wall.
Troubleshooting Common Problems
Here are a few issues you might face and how to fix them:
1. Lots of Leaves, Tiny Roots
Cause: Too much nitrogen, overcrowding, or low light
Fix: Thin seedlings, add more light, reduce fertilizer
2. Cracked Radishes
Cause: Overwatering after dry spells
Fix: Keep watering consistent
3. Yellow Leaves
Cause: Nutrient deficiency or water stress
Fix: Add compost or adjust watering
4. Slow Growth
Cause: Cold or shaded conditions
Fix: Move bottle to sunny spot and maintain temperature
Final Thoughts
Growing radishes in a bottle is a simple, sustainable, and satisfying gardening project that anyone can do with minimal space and cost. All you need is a plastic bottle, good soil, seeds, and a bit of care. Within a month, you’ll enjoy homegrown radishes right from your windowsill or balcony.
Whether you’re a beginner or a plant lover trying something new, this DIY method is a perfect way to start. Give it a try—it’s fun, eco-friendly, and yields fresh vegetables in record time!
If you’d like a printable version, infographic, or video script based on this blog post, just