Garlic is one of the most rewarding plants to grow — it’s simple, resilient, and incredibly useful in every kitchen. Whether you’re a first-time gardener or someone looking to maximize your harvest, learning how to grow garlic efficiently can transform your home garden.
If you’ve ever struggled with small bulbs, slow growth, or space limitations, this post is for you. Today, we’ll explore the “bottle technique” — a creative and eco-friendly way to grow garlic that helps you achieve bigger, healthier yields, even in limited space.
This method works beautifully for both urban gardeners and beginners who want to grow garlic using recycled plastic bottles. It’s low-cost, sustainable, and surprisingly effective.
Let’s dive into the step-by-step process of growing garlic using the bottle technique and learn how to get the biggest yields possible from just a few cloves.
Why Garlic Is Perfect for Beginner Gardeners
Garlic (Allium sativum) is one of the easiest crops to grow. You don’t need a large plot of land or advanced gardening tools — just a little patience and sunlight.
Here’s why garlic is ideal for beginners:
- Low Maintenance: Garlic doesn’t need daily attention. Once planted, it quietly does its job underground.
- Compact Growth: You can grow garlic in containers, bottles, or even small balcony gardens.
- Resistant to Pests: Unlike many vegetables, garlic naturally repels insects.
- Useful Harvest: Every clove becomes a new bulb, and the green shoots are edible too!
- Long Shelf Life: Once harvested, garlic stores well for months.
Now that you know why garlic is the perfect starter crop, let’s look at the creative bottle growing method that makes it even easier and more productive.
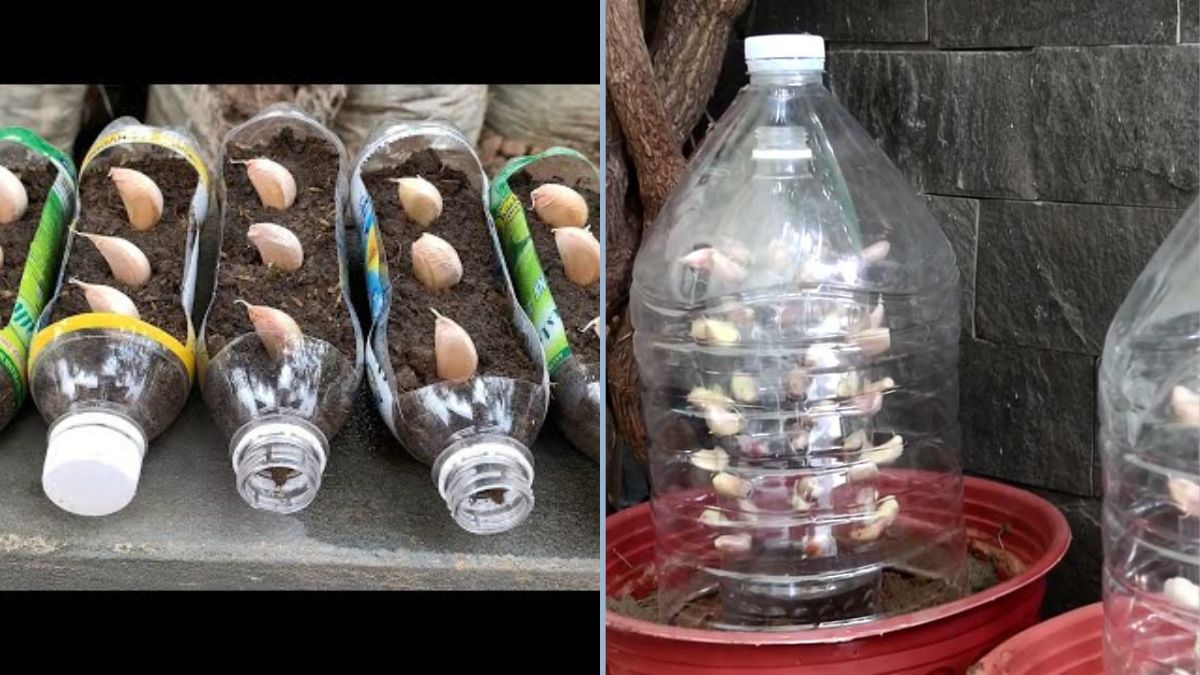
What Is the Garlic Bottle Technique?
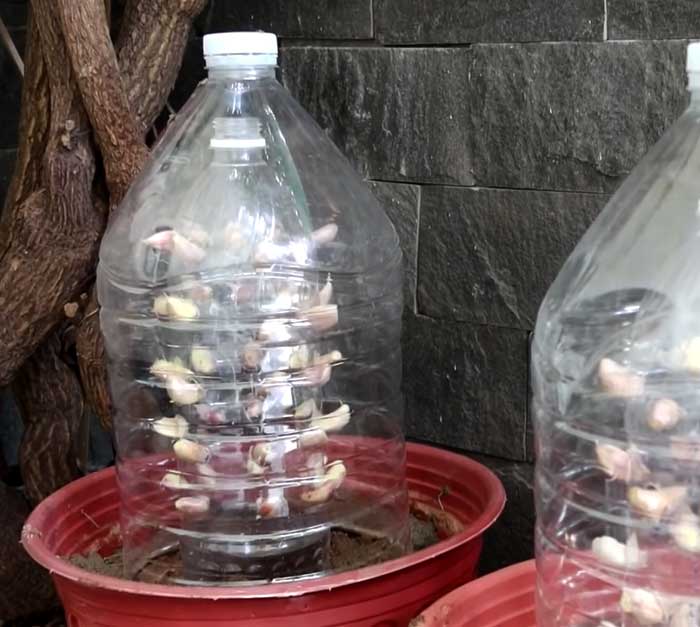
The bottle technique is a clever gardening method where garlic is grown in used plastic bottles instead of traditional soil beds or pots. It’s simple: you cut and modify plastic bottles to create a self-contained mini growing system.
This setup works for both hydroponic-style growth (in water) or container growth (with soil) — and both can give you strong, healthy plants.
The key benefits include:
- Recycling plastic waste into useful gardening tools.
- Saving space — perfect for small apartments or balconies.
- Better water control, reducing rot or overwatering.
- Encouraging bigger bulb growth thanks to consistent moisture and air circulation.
It’s an eco-friendly, cost-effective way to grow garlic even if you live in the city or don’t have access to a full garden.
Materials You’ll Need
Before you begin, gather these simple items:
- 1–2 used plastic bottles (1.5L or 2L water bottles are ideal)
- A sharp knife or scissors
- Garlic bulbs (organic or untreated for best sprouting)
- Clean water or rich soil mix (depending on your method)
- A toothpick or skewer (optional)
- Sunny spot (balcony, window, or terrace)
That’s all! Most of these materials are already at home — so no expensive garden tools are required.
Step-by-Step: Growing Garlic Using the Bottle Technique
Let’s go through the process from start to harvest.
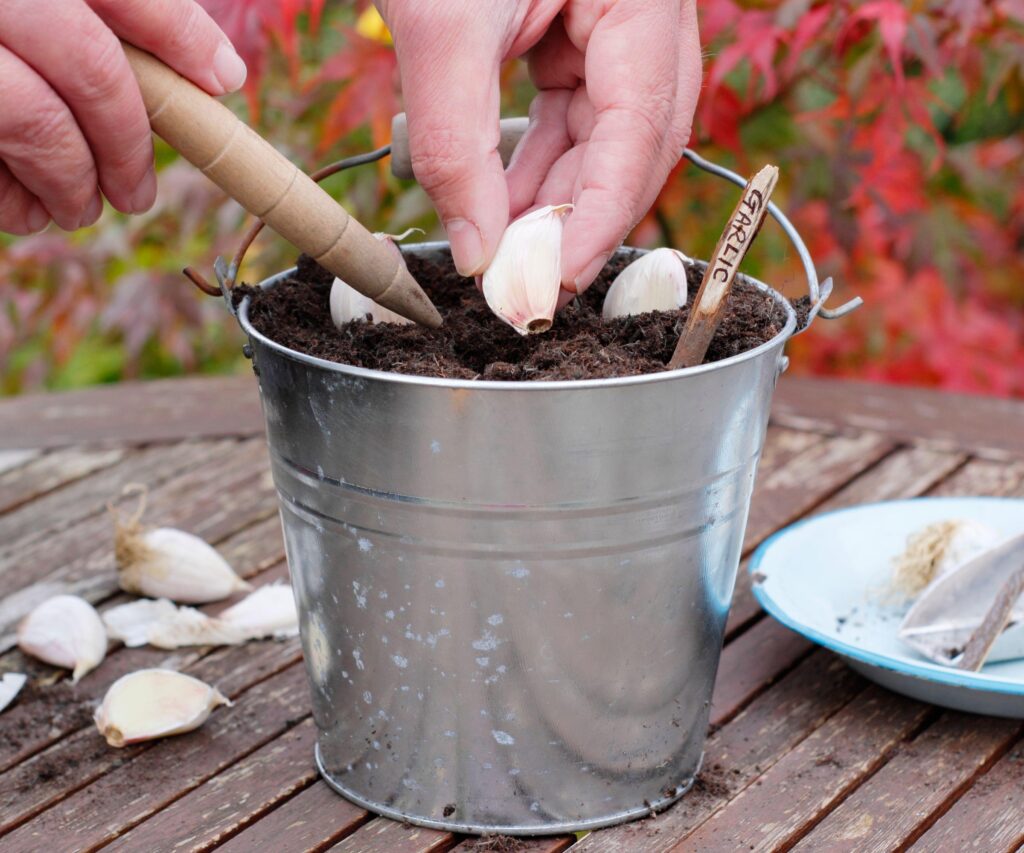
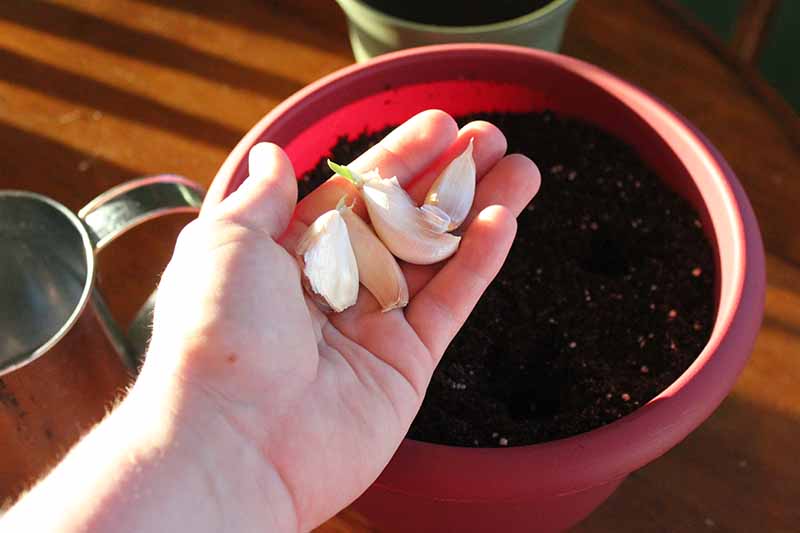
Step 1: Select the Best Garlic Cloves
Choose large, healthy bulbs — the bigger the clove, the bigger the future bulb.
Avoid soft, moldy, or shriveled cloves.
Separate the cloves gently without removing their papery skins. These skins protect the cloves during early sprouting.
Tip: Organic or locally grown garlic usually sprouts faster than imported garlic treated with preservatives.
Step 2: Prepare the Bottles

Take your used plastic bottle and clean it thoroughly. Remove labels and rinse away any residue.
Now, you have two main design options:
Option 1: Vertical Bottle Planter (for soil method)
- Cut the top third off the bottle.
- Poke 4–6 small holes at the bottom for drainage.
- Fill with a well-draining soil mix (40% garden soil, 30% compost, 20% coco peat, 10% sand).
- Place a single garlic clove about 1–2 inches deep, pointed end up.
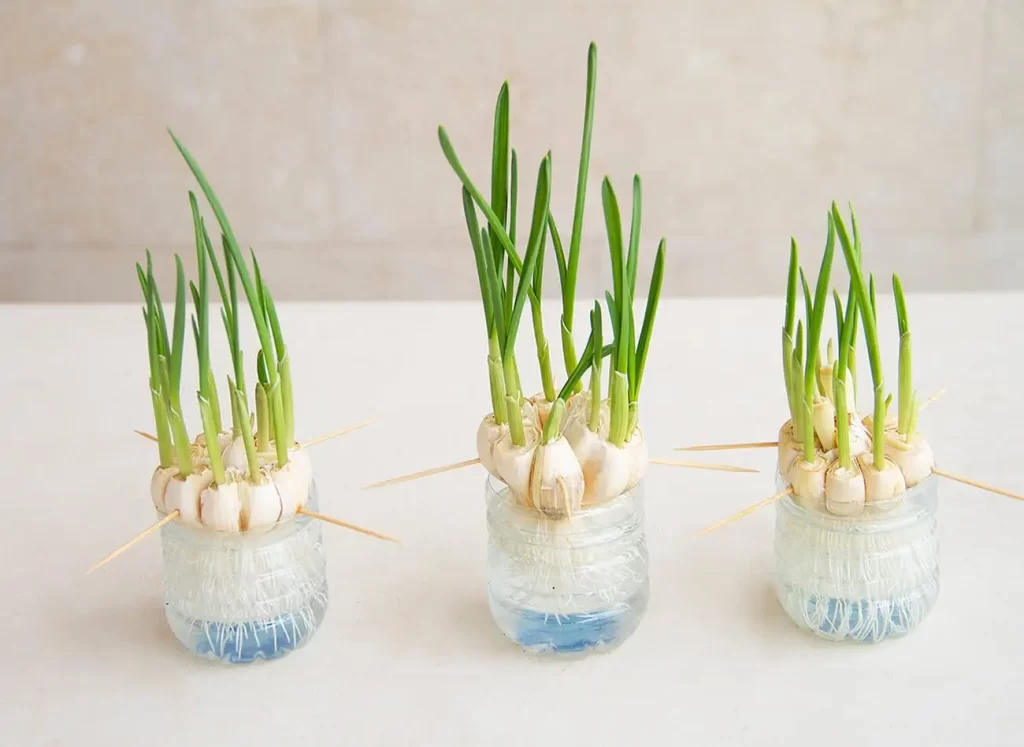
Option 2: Water Bottle System (for hydro method)
- Cut the top section of the bottle just below the neck.
- Invert the top part into the bottom half (like a funnel).
- Fill the bottom half with water so that only the base of the garlic clove touches the water — not the whole clove.
- You can use toothpicks to balance the garlic if needed.
Both methods work — choose the one that suits your space and style best.
Step 3: Add Water and Light
If using the hydro method, change the water every 2–3 days to prevent stagnation. Use filtered or dechlorinated water for best results.
For both methods:
- Place the bottle in a bright, sunny spot with at least 5–6 hours of sunlight daily.
- Avoid extreme heat — indirect sunlight works best for early sprouting.
Within 5–7 days, you’ll notice white roots emerging from the clove base and green shoots from the top — a sign your garlic is alive and thriving!
Step 4: Early Growth Care
Keep the soil or water consistently moist, but never soggy. Garlic likes a humid environment, but too much water can cause rot.
If using soil, check with your finger — if the top inch feels dry, it’s time to water.
If using water, make sure the level stays just below the clove’s base, not covering it.
Step 5: Feeding for Bigger Bulbs
Once your garlic starts growing shoots (usually after 2 weeks), it’s time to feed it.
For soil-grown garlic:
- Apply a diluted liquid organic fertilizer every 10–14 days.
- Compost tea, seaweed extract, or fish emulsion works wonders.
For water-grown garlic:
- Add a weak nutrient solution (like hydroponic fertilizer) once a week.
Pro Tip: High nitrogen helps early leaf growth, while phosphorus and potassium support bulb development. As the plant matures, switch to a fertilizer with less nitrogen and more potassium for bigger bulbs.
Step 6: Transplant (Optional for Bigger Harvests)
If you started in water, you can transplant the sprouted garlic into soil once roots reach 2–3 inches long.
To do this:
- Prepare a pot or garden bed with rich, well-draining soil.
- Plant the garlic clove so that the green shoot is above the soil surface.
- Water lightly after transplanting.
This helps your garlic continue developing larger bulbs for harvest.
Caring for Your Garlic Plants
To ensure strong growth and high yields, follow these care tips:
- Sunlight: Garlic needs at least 6 hours of sunlight per day.
- Watering: Keep moisture consistent, especially during bulb formation.
- Pruning: Remove any yellowing leaves to direct energy toward the bulbs.
- Temperature: Garlic prefers mild weather (18–28°C / 64–82°F).
- Air Circulation: If growing indoors, ensure good airflow to prevent fungus.
For container growers, remember — garlic’s growth depends heavily on root space. If your plant seems stunted, you can transplant it into a larger bottle or pot.
When and How to Harvest
Garlic usually takes 90–120 days to mature, depending on the variety. You’ll know it’s ready when:
- The green leaves start to turn yellow and dry out.
- The stem feels firm, not soft.
- You can see the bulb shape forming under the soil or near the bottle edges.
To harvest:
- Gently loosen the soil or remove the garlic from the bottle.
- Brush off excess soil but don’t wash immediately.
- Cure (dry) the bulbs in a warm, shaded spot for about 7–10 days.
Once cured, your garlic is ready for cooking, replanting, or storage!
Benefits of the Bottle Technique
The bottle technique isn’t just convenient — it’s revolutionary for home gardeners. Here’s why:
- Saves Space – Perfect for balconies, small gardens, or even kitchen windows.
- Eco-Friendly – Recycles plastic waste into something useful.
- Great for Beginners – Simple steps with visible results in days.
- Prevents Overwatering – Clear bottles help monitor moisture and root health.
- Bigger Yields – Consistent watering and root oxygenation help bulbs grow larger and healthier.
Plus, it’s fun and educational — kids love watching garlic sprout and grow!
Common Mistakes to Avoid
To get the best results, avoid these beginner errors:
- Submerging the entire clove – Only the bottom should touch water.
- Not changing the water regularly – Leads to foul smell and root rot.
- Too little sunlight – Causes weak, leggy shoots.
- Overcrowding – One bottle per clove gives better airflow and bulb size.
- Skipping fertilizer – Garlic is a heavy feeder; nutrients are crucial for big yields.
Final Thoughts: Turn Bottles Into Garlic Gold
Growing garlic with the bottle technique is more than a gardening trick — it’s a lifestyle shift toward sustainability, creativity, and self-sufficiency.
You don’t need expensive tools or big land to grow healthy garlic. With just a few bottles, water, and sunlight, you can produce beautiful green shoots and large, flavorful bulbs right in your home.
Whether you’re a city gardener, a beginner, or simply someone who loves experimenting with eco-friendly methods, this bottle technique will help you grow smarter and harvest bigger.
So next time you finish a plastic bottle, don’t toss it — turn it into a garlic-growing machine!
Start today, and in a few short months, you’ll have your own homegrown garlic ready to flavor your favorite dishes — fresh, organic, and all yours.