Have you ever bought a piece of fresh ginger from the grocery store and wondered if you could grow your own? The good news is — you can! In fact, store-bought ginger can be turned into a thriving homegrown plant with the right technique.
But here’s the catch: many people try growing ginger only to find that it takes weeks to sprout roots, or worse, it never grows at all. The secret lies in knowing how to prepare and encourage the ginger to sprout quickly.
In this post, we’ll explore a fascinating trick to make store-bought ginger root faster, and guide you step by step through the entire process — from selection to sprouting, planting, and growing.
Whether you have a backyard, balcony, or just a sunny windowsill, this simple guide will help you grow lush, aromatic ginger plants — starting right from your kitchen.
Why Grow Ginger at Home?

Ginger (Zingiber officinale) isn’t just a spice — it’s one of nature’s most versatile plants. Growing your own has several benefits:
- Freshness: Homegrown ginger is fresher, juicier, and more flavorful than store-bought.
- Chemical-Free: Commercial ginger is often treated with growth inhibitors or preservatives. Growing your own means it’s 100% organic.
- Cost-Effective: One small piece of ginger can multiply into several new rhizomes in just a few months.
- Beautiful Plant: Ginger’s lush green leaves make it a gorgeous ornamental plant for your kitchen or balcony.
- Medicinal Uses: Fresh ginger is a natural remedy for nausea, inflammation, and colds.
So why not grow your own spice garden — starting with ginger?
Step 1: Choosing the Right Ginger
Not all ginger roots from the supermarket are suitable for planting. To ensure success, follow these tips when selecting your starter ginger:
- Look for plump, firm pieces: Avoid shriveled, dry, or moldy rhizomes.
- Check for buds or “eyes”: These are small yellowish or greenish points from which new shoots will emerge.
- Prefer organic ginger: Non-organic ginger is often treated with chemicals that delay sprouting. Organic rhizomes root much faster.
If you can’t find organic ginger, don’t worry — you can still grow regular store-bought ginger. You’ll just need an extra step to wake it up before planting (that’s where our “interesting trick” comes in!).
Step 2: The Trick — How to Make Ginger Root Quicker
Here’s the part most people miss: pre-sprouting ginger before planting makes all the difference.
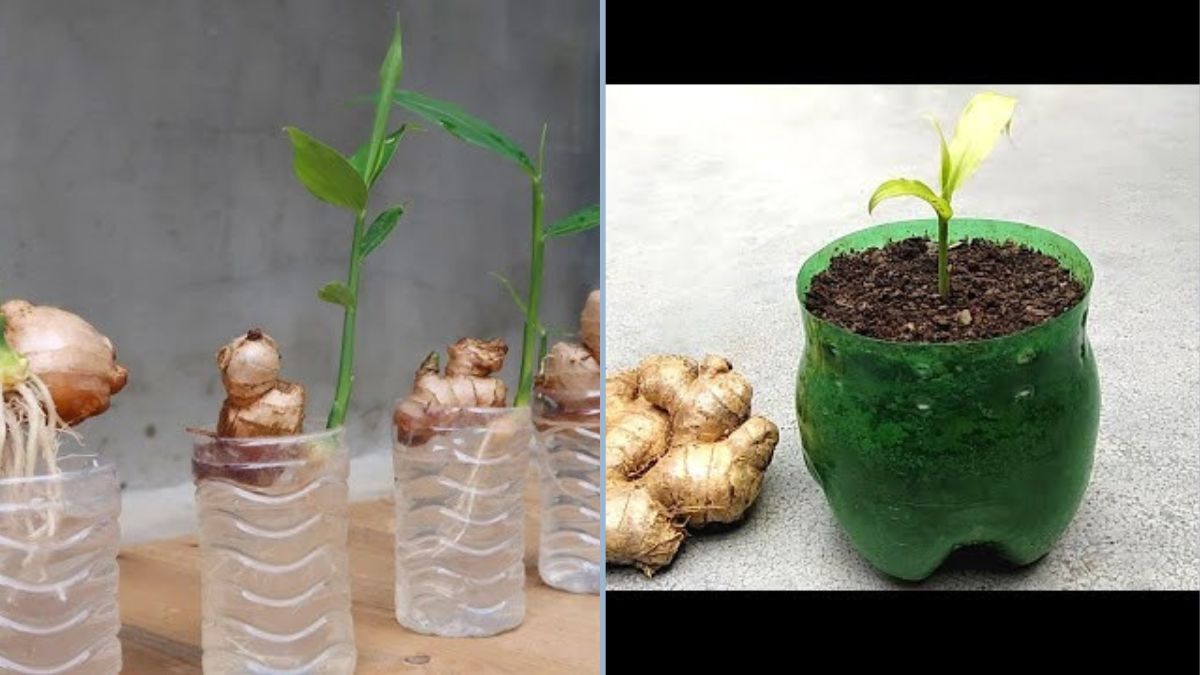
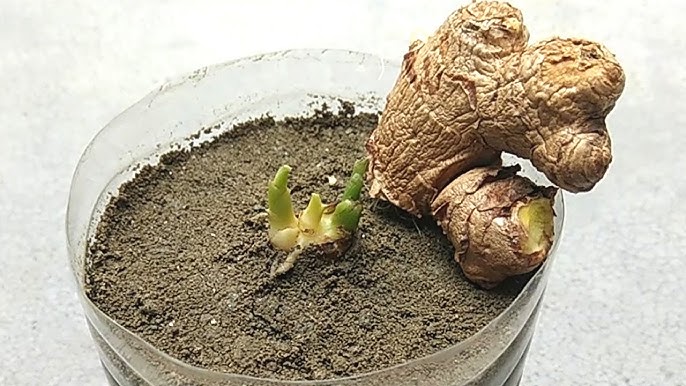
Instead of burying a dry rhizome directly into soil and waiting weeks, you can use this simple trick to make it sprout in as little as 7–10 days.
The Warm Water Soak Trick
- Rinse your ginger to remove any dirt or chemical residue.
- Place the rhizome pieces in warm (not hot) water, about 40–45°C (104–113°F).
- Soak for 2 to 4 hours, or overnight if your ginger feels very firm.
This process hydrates the rhizome, softens its skin, and washes off any growth inhibitors used in commercial storage.
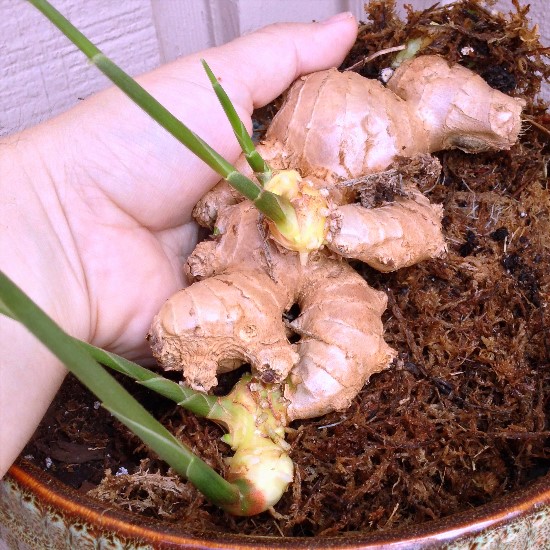
After soaking, pat the pieces dry and leave them in a warm, humid spot (like a kitchen counter or sunny window) for a couple of days. You’ll soon notice tiny green buds forming — that’s your sign it’s ready to plant!
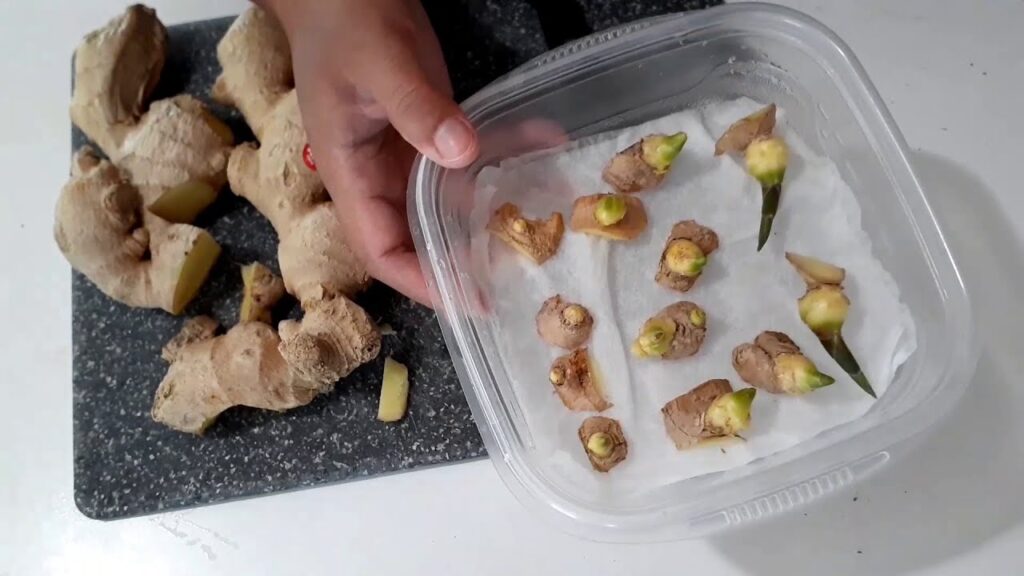
Alternative Quick-Sprouting Method: The Plastic Bag Greenhouse
Another great trick involves creating a mini greenhouse effect:
- Wrap your soaked ginger pieces in slightly damp paper towels.
- Place them inside a transparent plastic bag (like a zip-lock bag).
- Keep the bag in a warm, shaded area — around 25–30°C (77–86°F).
Open the bag every couple of days to let air circulate and prevent mold. Within a week or two, roots and shoots will start appearing.
This simple greenhouse method mimics tropical humidity, which ginger loves — and dramatically speeds up sprouting time.
Step 3: Preparing the Pot or Garden Bed
Once your ginger starts sprouting, it’s time to plant it. Ginger grows best in loose, rich, and moist soil, similar to its native tropical environment.
Soil Mix:
Combine:
- 40% garden soil
- 30% compost or organic manure
- 20% coco peat or peat moss (for moisture retention)
- 10% sand (for drainage)
Ginger hates waterlogged conditions, so make sure the soil drains well.
Choosing a Container:
If growing in pots:
- Use a wide, shallow container (at least 12–16 inches wide).
- Ensure there are drainage holes at the bottom.
- Line the base with small stones to prevent soggy roots.
If growing outdoors, pick a shaded area — ginger prefers indirect sunlight and warm, humid air.
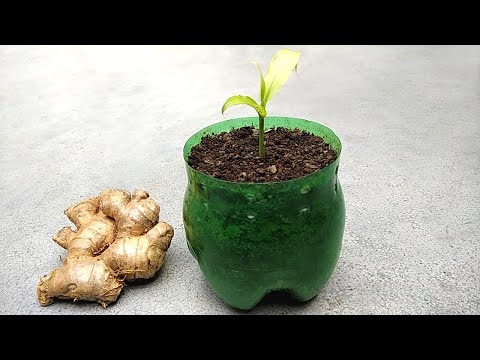
Step 4: Planting the Ginger
Follow these simple steps to plant your sprouted ginger:
- Cut the rhizome into small pieces, each with at least one or two buds.
- Let the cut edges dry for a few hours before planting to prevent rot.
- Place each piece horizontally in the soil, with the buds facing upward.
- Cover lightly with 1–2 inches of soil — don’t bury them too deep.
- Water gently until the soil is evenly moist.
Step 5: Watering and Care
Ginger loves moisture but dislikes standing water. Keep the soil consistently damp — never dry and never soggy.
Here’s the ideal watering schedule:
- Warm weather: Water every 2–3 days.
- Cool weather: Water once a week.
If you’re growing indoors, mist the leaves occasionally to mimic tropical humidity.
Sunlight:
Place your ginger where it gets filtered sunlight or light morning sun. Direct, harsh afternoon sun can scorch the leaves.
Temperature:
Ideal growth happens between 22–30°C (72–86°F). Avoid cold drafts — ginger hates temperatures below 15°C (59°F).
Step 6: Feeding Your Ginger
To get lush green leaves and fat rhizomes, ginger needs regular feeding. Every 3–4 weeks, feed your plant with:
- Compost tea or diluted liquid fertilizer
- Banana peel tea (great for potassium)
- Fish emulsion or seaweed extract
Always apply fertilizer after watering to avoid root burn.
Step 7: Watching It Grow
Over the next few weeks, your ginger will send up leafy green shoots. These grow slowly at first, then spread out as the plant matures.
Ginger typically takes 8–10 months to produce harvestable rhizomes, but you can start harvesting small “baby ginger” after 4–5 months.
If the leaves start turning yellow toward the end of the cycle, that’s a natural sign your ginger is maturing underground.
Step 8: Harvesting Your Homegrown Ginger
When the plant’s leaves dry out and turn brown, your ginger is ready for harvest. Here’s how:
- Stop watering for 10–14 days before harvest to let the soil dry slightly.
- Gently dig up the rhizomes with your hands or a garden fork.
- Brush off the soil and rinse lightly.
You can replant a few healthy pieces right away for the next cycle — and enjoy your endless supply of homegrown ginger!
Bonus Tips to Grow Bigger, Healthier Ginger
- Mulch Your Soil: Covering the soil with leaves or straw helps retain moisture and regulate temperature.
- Use Wide Containers: Ginger spreads horizontally — more surface area equals more roots.
- Rotate Regularly: Every few weeks, gently loosen the topsoil to help air reach the roots.
- Trim Old Leaves: Remove dry or damaged leaves to redirect nutrients into new rhizome growth.
- Be Patient: Ginger grows slowly but steadily — good things take time!
Common Mistakes to Avoid
Even though ginger is easy to grow, beginners sometimes make these mistakes:
❌ Using unsoaked store ginger — it may still have chemical inhibitors.
❌ Planting too deep — this delays sprouting and causes rot.
❌ Overwatering — soggy soil suffocates the rhizomes.
❌ Placing in full sun — ginger prefers partial shade.
❌ Ignoring drainage — standing water is ginger’s worst enemy.
Avoiding these errors will keep your plants healthy and your harvest plentiful.
Final Thoughts: Turn Your Grocery Ginger into a Green Treasure
Growing store-bought ginger isn’t just possible — it’s easy, fun, and deeply satisfying when done right. With the warm water soaking trick or the plastic bag greenhouse method, you can awaken even the laziest ginger rhizome and get it sprouting in record time.
In just a few months, you’ll have your own supply of fresh, aromatic ginger ready for tea, stir-fries, and home remedies.
So, the next time you’re at the supermarket, grab an extra piece of ginger — not for cooking, but for planting. With this simple rooting trick, you’ll be amazed how quickly nature rewards your patience.
Your homegrown ginger journey starts now — one rhizome, one bottle, one trick at a time!